Terrazzo Floor Restoration Beneath Boards In Northampton
Last Updated on October 11, 2026 by David
A worn terrazzo floor beneath old wooden boards can still hold recoverable character. That was certainly the case in this Northampton property, where adhesive contamination and cracks became apparent once the covering was lifted.
The photographs below follow the floor from its discovery through repair, resurfacing, polishing and aftercare.
A Northampton Floor Was Found Beneath Old Wooden Boards
Once the wooden boards were lifted, the terrazzo became visible in the room’s natural light and the project moved from considering replacement to recovering the original floor. The client had expected to assess whether the concealed surface could be saved, rather than assuming new flooring was the only option.
Older Northampton houses often combine original rooms with later alterations, and this room had acquired a timber covering that concealed the floor below. With the remaining boards removed, the client could compare the existing terrazzo against the option of a new tiled floor and chose to retain the character already present in the property.

Thick Adhesive Covered the Newly Uncovered Surface
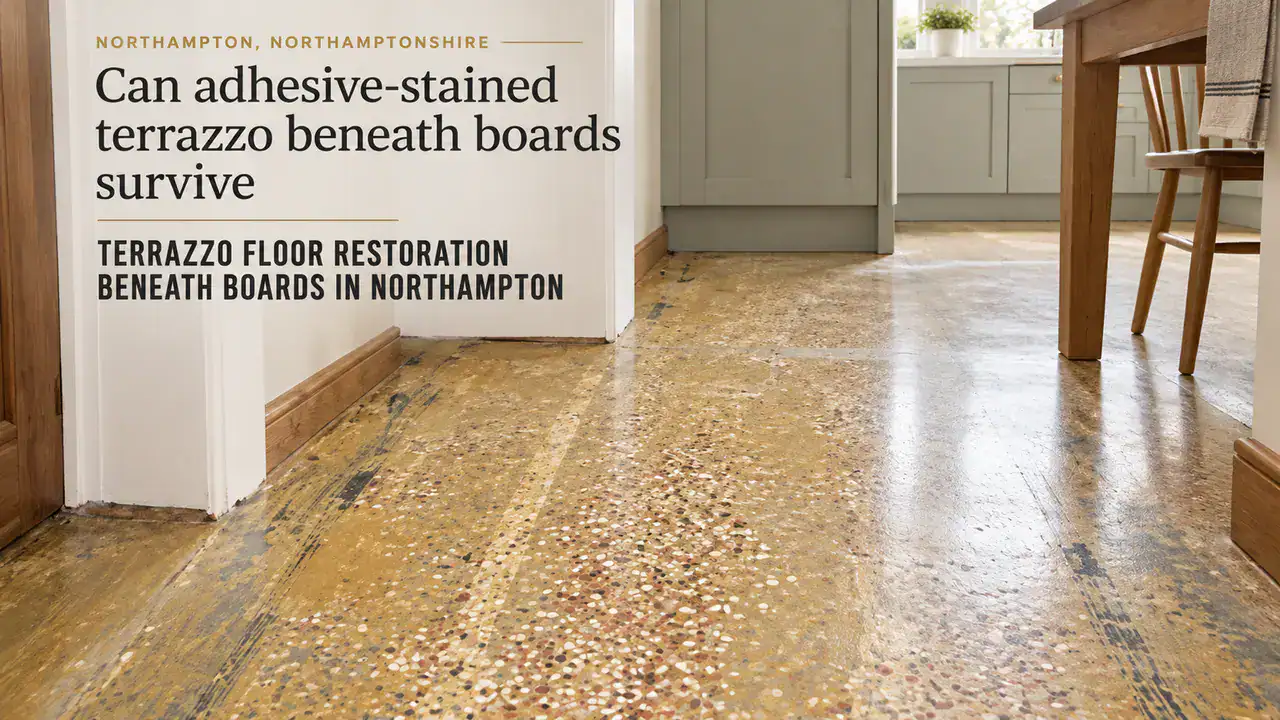
The terrazzo was physically intact beneath the remaining flooring, but a thick layer of adhesive became apparent once the boards had been removed and the full exposed area could be viewed. This residue obscured the original colour, chip detail and finish, so the occasional clean-looking patch could not be taken as representative of the floor as a whole.
The client removed all of the wooden flooring so the complete surface could be assessed before deciding what to do next.

The old adhesive had built up substantially, although it had not bonded strongly enough to prevent controlled removal. I used a heavy-duty hand scraper to lift the residue, avoiding chemicals that could have increased contamination or affected the cement matrix. Once cleared, the exposed areas provided a more reliable view of the worn surface.

Cracks Became Visible Once the Adhesive Was Removed
Removing the adhesive did not make every mark disappear. Beneath the cleared surface, several larger cracks became obvious alongside finer hairline lines, which I left unchanged. The wider cracks interrupted the visible surface plane; the fine lines made little difference to the finished appearance in this particular project.
A wider terrazzo crack is a physical break through the cement matrix, allowing soil or adhesive to lodge within the opening. This leaves the homeowner with a dark or open line that remains clear even after surface contamination has been removed. Fine hairline cracking, by comparison, can remain visually minor and stable enough to retain without filling.
I prepared the wider cracks using diamond-cutting tools, removing contamination and weak edges that could interfere with the repair. The fine hairline cracks were left as found because filling every narrow line would not have produced a meaningful visual improvement. The intervention therefore focused on the defects affecting the floor’s continuity.

The Larger Cracks Needed Colour-Matched Repairs
Colour-matched epoxy repairs marked the turning point in the Northampton restoration. Once the cracks had been prepared and filled, they could be taken through grinding, honing and surface renewal as part of a single controlled process. The repair material stabilised the wider openings whilst preserving the surrounding aggregate pattern as closely as the available materials allowed.
I followed a defined sequence because every stage set up the next and prevented repaired areas from sitting proud of the surrounding terrazzo. The cement matrix and marble-chip aggregate respond differently to abrasion, so a controlled diamond progression mattered far more than simply applying more pressure or relying on a coarse grit throughout.
- I filled the prepared openings with colour-matched epoxy, accepting that older aggregate rarely permits an invisible repair.
- I ground the cured repairs flush, so the filler met the surrounding surface without a raised edge.
- I renewed the worn upper layer with planetary equipment, then progressively refined the continuous surface.
- I completed the honing sequence so the repaired areas and original terrazzo shared a consistent finish.
A planetary grinding machine spreads pressure through its multi-head movement, providing broad coverage and more consistent correction than isolated hand abrasion. Metal-bond diamond abrasives first removed the contaminated and worn layer. Resin-bond diamond abrasives then refined the grinding marks through intermediate stages, including 50-grit, 100-grit and 400-grit passes, before the finer 800-grit refinement.
Grinding also revealed the aged binder’s natural pinholes and micro-voids; it did not create every small opening visible at this point. I controlled the rinse slurry and extracted it between passes so residue was not redeposited into the pores, then continued honing until the surface provided an even base for polishing. This planetary grinding precision kept the repaired floor level without unnecessary removal of sound material.

Progressive honing removed the remaining scratch pattern and brought the repaired sections into closer visual agreement with the surrounding surface. A related Northampton terrazzo polishing project shows the same importance of controlled refinement, although this account remains focused on the single floor uncovered beneath the wooden boards.
The Marble Chips’ Colour Variation Was Brought Out
After polishing, the marble chips caught the light more clearly across the terrazzo, whilst the applied finish helped retain the floor’s renewed colour variation. Before this stage, adhesive staining and worn binder had muted the aggregate. Afterwards, the decorative chips showed greater gloss and clearer visual separation without losing the floor’s original character.
I used a marble polishing powder because the exposed aggregate needed further optical enhancement after honing, not because more aggressive abrasion would have improved the outcome. The powder compound required careful application: mild acid can produce an immediate reaction on acid-sensitive chips and cement binder. Controlled polishing therefore protected the surface from chemical dissolution and roughening.
Once the surface had dried and the slurry had been removed, I applied three coats of colour-enhancing sealer. The penetrating treatment deepened the pale binder tone and increased visual richness whilst reducing absorption. It did not form a scratch-proof or acid-proof film, but it gave the restored floor breathable protection and more time to respond to spills.

The Finished Floor Was Restored
The contrast was most apparent when the restored floor was viewed against its earlier condition. What had been an adhesive-covered, cracked surface became a cleaner, more even terrazzo finish, with its marble-chip character still clearly visible. Adhesive no longer dominated the room, and the larger cracks no longer interrupted the restored surface plane.
Before: the newly exposed floor carried thick adhesive, worn areas and several larger cracks, whilst fine hairline lines remained part of its history. Replacement initially seemed plausible, but the full assessment showed that the original aggregate and cement matrix still provided a sound basis for renewal.
During: the larger cracks were repaired, the worn surface was renewed, and the finish was polished and sealed.
After: the floor regained a cleaner, more consistent reflective plane, with natural variation visible rather than a flat manufactured appearance. It looked significantly better than it had before intervention and was easier to clean and maintain because adhesive and loose surface contamination no longer interrupted the finish.

The work did not erase every fine line, and close inspection could still reveal the floor’s history. But the visible repairs blended into a coherent surface. The floor retained the depth and pattern that led the client to save it, whilst the renewed finish improved the room’s appearance dramatically. Broader guidance on terrazzo composition, restoration and care sits within the terrazzo flooring resource.
The Handover Covered Care for This Restored Surface
For this restored terrazzo floor, I explained that pH-neutral cleaning, removing grit before wet mopping and resealing at the right interval would help extend its life. I also advised the client not to use acidic products, as these can etch the marble chips and cement matrix. The restored floor was significantly easier to clean and maintain than the worn, adhesive-covered surface, as explained in the terrazzo maintenance advice.
Pro Tip: We recommend these products for daily Terrazzo maintenance cleaning.
|
Fila Pro Floor Cleaner
|
LTP MPG Sealer H20
|
Vileda H2PrO Spin Mop System
|

David Allen — Abbey Floor Care
David Allen has more than 30 years of experience restoring terrazzo and other hard floors through Abbey Floor Care. This Northampton case study records how he corrected adhesive contamination and larger cracks beneath wooden boards before renewing the floor’s surface and finish.
Recent Posts:
We work throughout the country, just some of our work counties:
Copyright © 2026 Abbey Floor Care. Tile And Natural Stone Cleaning Consultants FAQ - Privacy Policy - Terms And Conditions
Abbey Floor Care is a participant in the Amazon Services LLC Associates Programme, an affiliate advertising programme designed to provide a means for websites to earn advertising fees by linking to Amazon.co.uk. As an Amazon Associate, we earn from qualifying purchases.