Limestone Floor Restoration Best Practices for UK Homes
Last Updated on January 24, 2026 by David
Key takeaways from this article, “Limestone Floor Restoration Best Practices for UK Homes”
- ✅ Limestone is a natural, porous stone that requires gentle care due to its sensitivity to acids and moisture.
- 🧼 Use pH-neutral, stone-safe cleaners to avoid etching or dulling the surface—acidic products like vinegar or bleach should be avoided.
- 🪨 Common UK finishes include honed, polished, and tumbled, each requiring different restoration techniques to preserve their character.
- 🛠️ Restoration involves assessing wear, cleaning with appropriate products, and sealing to protect against future staining and erosion.
- 🧽 Regular maintenance with soft tools and mild solutions helps extend the life of limestone floors and maintain their natural elegance.
Understanding Limestone as a Flooring Material
Limestone flooring has long been admired in British homes for its natural warmth, timeless character, and quiet elegance. But unlike factory-made tiles, limestone is a living surface – shaped by nature, marked by time, and full of unique variation. Caring for it well isn’t about heavy machinery or harsh chemicals. It’s about understanding the stone itself, working with its qualities, and using the proper techniques to keep it looking beautiful year after year.
This guide walks you through the best practices for limestone floor restoration in the UK, from identifying wear and choosing gentle cleaners to polishing, sealing, and protecting your investment for the long term.
What Makes Limestone Unique
Limestone is a natural sedimentary rock formed from the compaction of marine organisms such as shells and coral. Over millions of years, this creates subtle layers, soft tones, and delicate fossil markings that give each tile its character. Homeowners often love limestone for this understated charm – it feels organic and blends beautifully with both period and contemporary interiors.
However, those same natural features make limestone porous and sensitive. It readily absorbs moisture and reacts to acidic substances like wine, juice, or vinegar. For this reason, limestone floors require thoughtful care and the proper cleaning and sealing routine. When maintained correctly, limestone will last for decades, developing a gentle patina that adds depth and history to your home.
Common Limestone Finishes Found in UK Homes
Limestone floors in the UK usually come in one of three finishes – honed, polished, or tumbled. A honed finish is smooth and soft, with an authentic sheen, perfect for kitchens and hallways where a natural look is preferred. Polished limestone has a reflective surface that enhances colour depth but also shows marks more easily, requiring careful upkeep. Tumbled limestone is intentionally weathered, with rounded edges and a rustic surface often used in cottages or country-style homes.
Each finish responds differently to cleaning and restoration. For example, polishing a honed floor can change its texture, while aggressive cleaning can dull a polished one. Knowing which finish you have helps you choose products and techniques that respect the stone’s character.
Why Limestone Needs Specialist Care
Limestone’s main vulnerability lies in its calcium carbonate structure. It reacts to acids, so even mild household cleaners can etch or mark the surface. Abrasive pads and harsh detergents can also strip away the natural finish, leaving a patchy or chalky appearance.
Because of this, limestone floors need pH-neutral cleaners, gentle handling, and regular sealing. The goal isn’t to make them glossy, but to preserve their natural depth and smoothness. With careful maintenance, limestone’s beauty doesn’t fade – it matures gracefully, adding quiet value to your home over time.
Assessing the Condition of Your Limestone Floor
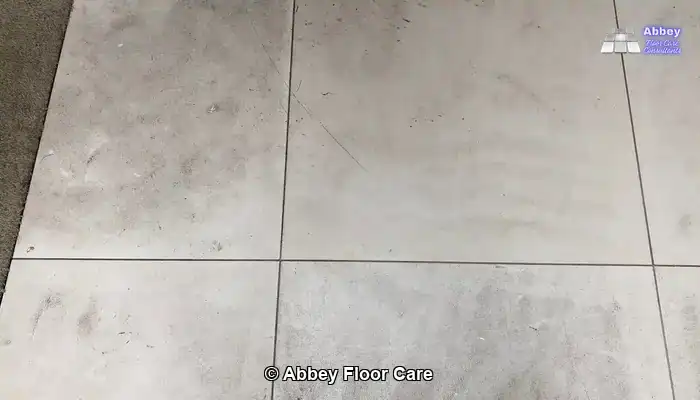
How to Identify Wear, Scratches, and Etching
Before restoring a limestone floor, take time to study its surface closely. Look for dull patches where traffic has worn the finish, or faint lines where furniture has dragged. Under good lighting, shallow scratches often appear as fine grey streaks, while etching from acidic spills tends to look like pale, cloudy spots. These imperfections are typical signs of age, but identifying them early helps determine how deep your restoration needs to go.
Checking for Stains and Sealant Breakdown
Stains are one of the first clues that your sealant may be wearing thin. You can perform a simple test by placing a few drops of water on the surface. If the water darkens the stone within a minute, it means the pores are open and the sealant has weakened. In kitchens, dark marks from cooking oils or red wine are common signs of unsealed or unprotected stone. Recognising these patterns helps target problem areas before cleaning or resealing.
When to Consider Professional Help
Some surface marks and mild dullness can often be addressed with careful home maintenance, but deep wear or widespread staining usually needs professional restoration. If your floor feels rough to the touch, has lost its even colour, or shows patches of erosion, it may be time for a skilled technician to rehone or polish it. Knowing when to stop and seek help protects your stone from costly mistakes and ensures long-lasting results.
Best Practices for Cleaning Limestone Floors
Choosing pH-Neutral and Stone-Safe Cleaners
Cleaning limestone starts with selecting the right products. Always choose a pH-neutral cleaner that is specifically formulated for natural stone. These products gently lift dirt without reacting with the limestone’s calcium base. Avoid using vinegar, lemon-based sprays, or bleach – their acidity can dull or etch the surface. In the UK, several specialist brands offer stone-safe cleaners that leave no residue and help preserve the protective seal.
If you’re unsure whether a product is suitable, test it in an inconspicuous area first. The goal is to clean without changing the surface texture or sheen. Using a mild solution consistently is far better than occasional deep cleans with strong chemicals.
The Right Way to Mop and Maintain Limestone
A simple routine is often the most effective. Begin by sweeping or vacuuming to remove grit that can scratch the surface. Then mop using warm water mixed with a small amount of stone-safe cleaner. Use a microfibre mop rather than a sponge or cotton one, as it spreads moisture evenly and traps dirt more efficiently.
Rinse the mop frequently to avoid redistributing grime and change the water as it becomes cloudy. After cleaning, dry the floor with a clean towel or dry mop to prevent water spots. Regular, gentle cleaning not only enhances appearance but also slows wear and keeps sealants performing properly.
Standard Cleaning Mistakes to Avoid
Many homeowners unintentionally damage limestone by cleaning it the wrong way. Using abrasive pads, steam mops, or generic degreasers can strip away sealants and scratch the surface. Over-wetting the floor can also force moisture into the pores, leading to discolouration over time.
Another standard error is neglecting routine maintenance and relying on “miracle” cleaning products. Limestone benefits far more from consistent care than occasional harsh treatments. Avoid shortcuts – gentle, regular cleaning will always produce better long-term results.
Restoring a Worn or Dull Limestone Floor
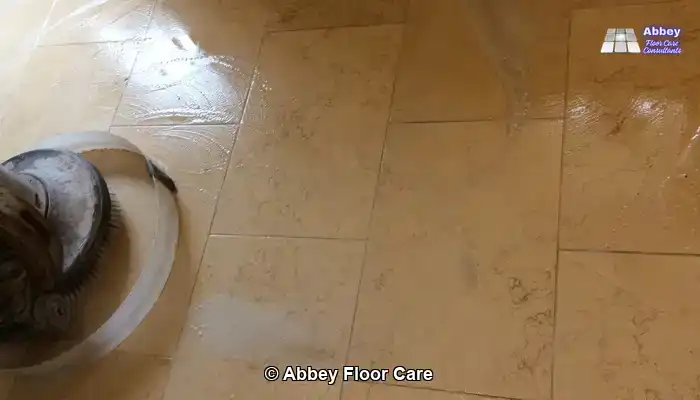
Deep Cleaning Before Restoration
Before any polishing or sealing, a thorough deep clean is essential. Start by removing all surface dirt, old cleaning residues, and any remaining sealant that may have discoloured over time. For this stage, a rotary floor machine fitted with soft brushes or pads designed for stone cleaning works best. Use a low-speed setting and a mild alkaline cleaner that breaks down grease and grime without damaging the limestone.
After cleaning, rinse the surface with clean water and allow it to dry completely. This ensures that the following stages of honing or polishing produce even, consistent results. Skipping a proper deep clean can trap dirt beneath the surface and affect the final finish.
Honing vs Polishing – What’s the Difference?
Honing and polishing are often confused, but they serve distinct purposes. Honing smooths out surface wear, removing minor scratches and dull spots to restore a uniform texture. It leaves a satin or low-sheen finish that’s ideal for high-traffic areas and natural-looking floors. Polishing, on the other hand, refines the surface even further using finer abrasives to achieve a reflective shine.
Choosing between the two depends on the room’s function and desired look. A kitchen or hallway may suit a honed finish that hides marks, while a polished limestone in a dining area adds brightness and depth. Both processes require precision and patience to maintain the stone’s natural beauty.
If you want to see how this choice works on a floor, this case study shows a limestone kitchen where a mid-polish finish was selected to balance clarity with day-to-day practicality: real polished limestone kitchen floor case study.
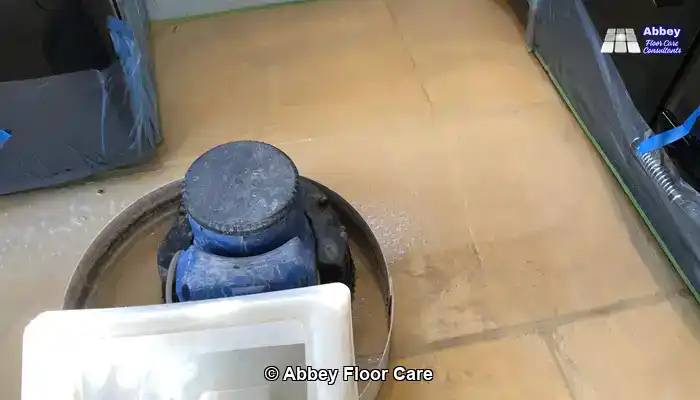
Using Diamond Pads Safely
Diamond abrasives are the key tools in limestone restoration. Each pad contains industrial-grade diamonds that gradually refine the stone’s surface. Starting with a coarse grit removes deeper scratches, while finer grits create a smooth, even texture. The key is steady, overlapping passes without pressure or haste.
Limestone varies in hardness, so different areas of the same floor may respond differently to each grit. Working too aggressively can create swirl marks or uneven gloss. When used correctly, diamond pads can transform a dull surface into a clean, refined finish that reveals the stone’s actual colour and character.
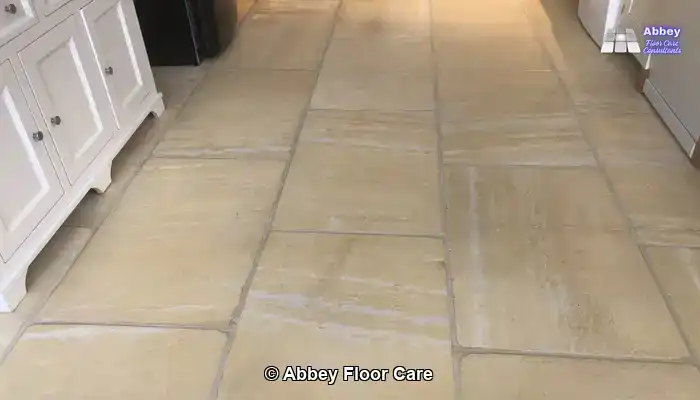
Bringing Back the Natural Finish
Once the honing or polishing is complete, the limestone should look evenly coloured and feel smooth underfoot. A good restoration doesn’t make the floor look brand new – it restores its natural vibrancy and depth. The aim is to achieve a balanced finish that reflects light softly and feels consistent across the room.
Allow the floor to dry completely before applying any sealant or protective treatment. At this stage, you’ll notice how the limestone’s fossil patterns and tonal variations have re-emerged. With proper care, your restored floor can remain elegant and timeless for many years.
Sealing Limestone Floors for Lasting Protection
Why Sealing Matters
Limestone is naturally porous, meaning it readily absorbs liquids and stains if left unprotected. Sealing the surface creates an invisible barrier that helps resist spills, oils, and everyday grime. It doesn’t make the floor waterproof, but it gives you crucial extra time to clean up before damage occurs. For most UK homes, sealing should be done after installation or restoration and refreshed every one to three years, depending on traffic and cleaning habits.
A well-sealed floor is easier to maintain and ages beautifully. The stone’s colour remains consistent, and routine cleaning becomes quicker and more effective. Sealing is one of the most straightforward yet most essential steps in protecting limestone for the long term.
Types of Sealers and Their Benefits
There are two main categories of sealers for limestone floors: penetrating sealers and surface sealers. Penetrating sealers soak into the stone, lining the pores while allowing the limestone to breathe. They are ideal for most residential floors and maintain a natural look. Surface sealers form a protective film on top of the stone, creating a slightly glossier finish that can enhance colour but may require more frequent maintenance.
In the UK, water-based sealers are often preferred for their low odour and environmentally friendly properties. Solvent-based sealers are still available and sometimes used for high-traffic commercial areas. The right choice depends on your floor’s finish, location, and how much sheen you want to achieve.
How to Apply a Limestone Sealer
Before applying a sealer, ensure the limestone is completely clean and dry. Any remaining moisture or dirt can prevent the sealer from bonding correctly. Use a lint-free cloth, roller, or microfibre applicator to spread the product evenly, working in small sections. Allow the sealer to absorb for the time specified by the manufacturer, then wipe away any excess before it dries on the surface.
Apply a second coat if the limestone is particularly porous or if recommended on the product label. Once finished, allow the floor to cure undisturbed for at least 24 hours before walking on it. This drying period ensures the sealer has bonded fully, providing optimal protection and a clean, even appearance.
Testing and Maintaining the Seal
You can test the effectiveness of your seal using a simple water droplet method. Place a few drops of water on the floor – if they bead on the surface, the seal is still intact. If it darkens the stone within seconds, it’s time to reseal. Regular mopping with a stone-safe cleaner helps maintain the seal’s performance and prevents the build-up of residues that can dull the surface.
Keeping an eye on your floor’s finish will help you catch early signs of wear before they become serious. Reapplying the sealer as needed is a quick and cost-effective way to preserve the beauty and durability of your limestone for years to come.
Preventing Wear and Keeping Limestone Floors Looking Their Best
Protecting High-Traffic Areas
Even a perfectly restored limestone floor will show signs of wear if it’s constantly exposed to grit and heavy foot traffic. Simple steps make a big difference. Place mats at every entrance to trap dirt before it reaches the floor, and consider using rugs or runners in hallways or kitchens where people walk most often. Choose mats with natural rubber backing rather than latex or PVC, as these can discolour the stone over time.
Regularly shake out or vacuum mats to prevent dust from being trapped and working its way back onto the floor. For families with pets, wiping paws after walks can also reduce the amount of grit and moisture brought indoors. These small routines help preserve both the look and the surface finish of your limestone.
Furniture and Footwear Tips
Limestone may feel solid, but it’s softer than materials like granite or porcelain. Always use felt pads or protective glides under furniture legs to prevent scratches when moving chairs or tables. Avoid dragging furniture across the floor—lift and reposition instead. For dining chairs, consider soft rubber castors that won’t leave marks or indentations.
Footwear can also affect the longevity of your floor. High heels, sports shoes, and work boots can leave dents or scuffs, especially on polished finishes. Encouraging a “no shoes indoors” rule is one of the simplest and most effective ways to extend the life of your limestone. Slippers or soft-soled house shoes will help preserve the surface’s natural sheen and smoothness.
Daily and Weekly Maintenance Routine
A consistent maintenance routine keeps limestone looking fresh without the need for frequent professional work. Sweep or vacuum daily with a soft-bristle attachment to remove abrasive dust and grit. Mop weekly with warm water and a small amount of pH-neutral stone cleaner. Avoid excessive water – limestone should be damp-mopped, not soaked.
For occasional deeper cleaning, use a microfibre mop and a slightly concentrated cleaner, but always rinse thoroughly with clean water. Dry the surface with a towel or mop to prevent water marks. This light, regular attention helps maintain both the protective seal and the visual appeal of your limestone floors.
Long-Term Appearance Care
Limestone ages gracefully when correctly cared for. Over time, it may develop a soft patina—a subtle sheen that enhances its natural charm. Embrace this as part of the stone’s evolution rather than a flaw. Regular cleaning, correct sealing, and gentle maintenance help this process occur evenly, ensuring your floor remains beautiful rather than blotchy or dull.
If certain areas begin to look slightly worn compared to others, light honing or re-polishing can restore balance without requiring a complete restoration. By planning and responding early to signs of wear, homeowners can keep their limestone floors looking elegant and inviting for decades.
Common Mistakes to Avoid When Caring for Limestone Floors
Using Harsh or Acidic Cleaners
One of the most common causes of damage to limestone floors is the use of harsh or acidic cleaning products. Many household cleaners, especially those designed for bathrooms or kitchens, contain acids that can etch the stone’s surface and permanently dull its finish. Even mild acids such as vinegar, lemon juice, or cola can leave pale marks that are difficult to remove. Always choose a pH-neutral cleaner specifically formulated for natural stone. These products clean effectively without stripping away the sealant or altering the stone’s appearance.
If you’re unsure about a product, test it on a small, inconspicuous area first. A few minutes of caution can prevent hours of repair work later. Once damage occurs, it often requires professional honing or polishing to correct, so prevention is always the best approach.
Skipping Regular Sealing
Many homeowners forget that limestone needs periodic resealing. Over time, foot traffic and cleaning wear away the protective layer, leaving the stone exposed to stains and moisture. A simple water drop test once or twice a year can tell you whether your seal is still working. If water soaks into the stone rather than beading on the surface, it’s time to reseal.
Skipping this step allows liquids, dirt, and even cleaning agents to penetrate the surface, leading to permanent discolouration. Regular resealing takes little time but significantly extends the life and beauty of your limestone floors. Treat it as part of your home’s seasonal maintenance routine, much like servicing a boiler or repainting exterior woodwork.
Overusing Water During Cleaning
Another easy mistake is using too much water when mopping. While limestone is durable, it’s still porous. Excess moisture can seep through the surface and, over time, weaken the bond between the stone and its subfloor. The result can be discolouration, dull patches, or lifting tiles. Instead of soaking the floor, use a lightly damp mop and wring it out thoroughly before each pass. This approach effectively removes dirt while protecting the stone’s structure.
Always dry the surface after mopping with a clean, absorbent cloth or towel. Not only does this prevent streaks and watermarks, but it also helps you notice developing issues early, such as uneven shine or small cracks that might need attention.
Neglecting Grout Maintenance
Grout lines are often overlooked, yet they can quickly spoil the appearance of a beautiful limestone floor. Because grout is even more porous than stone, it tends to absorb dirt and spills easily. Regular cleaning with a soft brush and a gentle stone-safe cleaner keeps it looking fresh. For older grout, applying a grout sealant can make maintenance easier and prevent staining.
Neglecting grout can lead to dark lines and discolouration, which can make the whole floor seem tired, even if the stone itself is in good condition. A little care every few weeks keeps both grout and limestone harmoniously clean and well-balanced in colour.
Delaying Small Repairs
Chips, scratches, and small cracks may seem minor at first, but can worsen over time. Leaving them unattended allows dirt and moisture to collect, leading to further deterioration. Promptly filling chips or cracks with a colour-matched stone filler preserves the integrity of the floor and prevents future repair costs.
Homeowners often underestimate how quickly minor defects can spread, especially in busy areas. Regular inspection and early intervention are the simplest ways to maintain a flawless surface and avoid the need for more extensive restoration later.
When to Call a Professional for Limestone Floor Restoration
Recognising When DIY Isn’t Enough
While homeowners can easily handle routine cleaning and sealing, there are times when professional intervention becomes essential. If your limestone has lost its sheen, shows deep scratches, or has developed uneven patches that regular cleaning won’t fix, it may be time for expert restoration. Signs such as dull spots that do not respond to polishing, or stains that have penetrated beyond the surface, also indicate that a deeper treatment is required.
Professional restoration goes beyond surface cleaning. It involves specialised tools and methods that safely remove damaged stone layers, repair cracks, and restore the original finish without harming the limestone. Trying to handle this level of work with standard DIY tools often risks causing further damage, so knowing when to step back is an essential part of caring for your floors.
What Professionals Do Differently
Experts in limestone floor restoration use advanced equipment designed specifically for natural stone. Their work usually begins with a detailed inspection to assess the floor’s condition and identify issues such as etching, lippage, or deep stains. Depending on the situation, they may use a combination of honing, polishing, and sealing to achieve a consistent, long-lasting finish.
Unlike general cleaners, professional restorers use diamond abrasives and pH-balanced products that are matched to the hardness and porosity of your specific limestone. They can also repair grout lines, re-level tiles, and apply premium sealers that offer more extended protection. Their experience helps ensure that every treatment is both practical and sympathetic to the stone’s natural look.
Benefits of Professional Restoration
One of the key advantages of professional restoration is the depth and quality of the results. A skilled restorer can bring back the clarity, colour, and texture of limestone that has dulled over many years. The process also removes embedded dirt that household products can’t reach, giving the surface a fresh and even appearance. Once completed, a properly restored limestone floor not only looks new but is also easier to maintain.
Professional restoration can also significantly extend the life of your floor. By removing micro-scratches and applying industrial-grade sealers, professionals help protect against future wear. In the long run, this can reduce maintenance costs and delay the need for full replacement, making it a wise investment for any homeowner who values their limestone’s lasting beauty.
How to Choose a Qualified Restorer
If you decide to hire a professional, it’s worth taking time to choose the right one. Look for specialists with proven experience with limestone and who can explain their process clearly. Ask for before-and-after photos of previous projects and check whether they use professional-grade stone restoration equipment. Reviews and local recommendations are often the most reliable indicators of quality.
Good communication is also essential. A reputable restorer will be happy to answer your questions about products, methods, and aftercare. They’ll also provide a realistic timeline and clear expectations about results. Choosing someone who values your floor’s long-term health over quick fixes ensures you receive lasting, high-quality work.
Aftercare Following Professional Restoration
Once your floor has been professionally restored, proper maintenance is key to preserving the results. Avoid walking on the surface for at least 24 hours after the final sealant has been applied. Continue using pH-neutral cleaners and soft mops, and place protective pads under furniture as before. Regularly check the surface for signs of dullness or water absorption, and schedule resealing when necessary.
Professional restorers often provide tailored aftercare advice based on your home’s conditions, such as foot traffic levels and sunlight exposure. Following this guidance helps keep your limestone floor looking pristine and reduces the likelihood of needing major restoration again in the near future.
Long-Term Care and Maintenance Tips for Limestone Floors
Establishing a Simple Maintenance Routine
The key to keeping a limestone floor in excellent condition is a simple, consistent routine. Regular sweeping or vacuuming with a soft brush attachment removes grit before it can scratch the surface. Weekly damp mopping with a pH-neutral cleaner keeps the stone clean without damaging the sealant. Always use clean water and dry the surface after washing to prevent streaks or water spots.
For busy households, scheduling specific days for light cleaning helps form good habits. A few minutes spent each week on basic maintenance can prevent the gradual build-up of grime that leads to dullness or discolouration. This steady care ensures your limestone retains its natural elegance year after year.
Seasonal Resealing Schedule
Limestone floors benefit from periodic resealing to maintain protection against spills and wear. In most UK homes, resealing every 12 to 24 months is ideal, depending on foot traffic levels. You can easily test the seal by sprinkling a few drops of water onto the surface – if the water beads up, the seal is still effective. If it darkens or absorbs, resealing is due.
Before applying a new sealant, thoroughly clean and dry the floor to ensure proper adhesion. High-quality penetrating sealers offer the best balance of protection and natural appearance, as they soak into the stone rather than sitting on its surface. Keeping a resealing schedule as part of regular home care avoids costly full restorations later.
Managing Spills and Everyday Accidents
Spills happen, especially in kitchens and dining areas, but how you handle them determines whether stains form. Blot spills immediately with an absorbent cloth rather than wiping, which can spread the liquid. Avoid using coloured towels or paper that might transfer dye onto the stone. Follow up with a damp cloth and mild cleaner to remove any residue.
For tougher stains, such as oil or wine, a poultice paste made from baking soda and water can help lift the mark without damaging the limestone. Apply it, cover it with plastic wrap, and let it sit overnight before gently wiping it away. Acting quickly and gently is always the best strategy when caring for natural stone surfaces.
Protecting Against Seasonal Changes
Although limestone is durable, changes in indoor temperature and humidity can subtly affect it over time. Keeping your home environment consistent helps prevent minor expansion or contraction that might stress joints and grout lines. In winter, consider using a humidifier if central heating makes the air very dry. In summer, ensure good airflow to reduce moisture build-up in rooms with stone floors.
Placing doormats and using furniture protectors year-round also guards against seasonal wear. The combination of clean habits, consistent indoor conditions, and timely maintenance keeps your limestone floor both beautiful and resilient year-round.
How to Refresh the Surface Between Restorations
Even with careful maintenance, limestone may gradually lose some of its initial lustre. Light polishing with fine diamond pads or specialist polishing powder can restore a subtle sheen without the need for a complete professional restoration. These products are widely available in the UK and are suitable for homeowners who are comfortable with gentle DIY care.
If you choose to polish, always follow manufacturer guidance and test in a small area first. Work slowly and evenly, keeping the surface slightly damp. Once complete, buff with a dry microfibre cloth to reveal a clean, smooth finish. This approach keeps the surface bright and fresh while protecting your investment for the long term.
Frequently Asked Questions About Limestone Floor Restoration
How often should I restore my limestone floor?
Most limestone floors only need complete restoration every five to ten years, depending on how much traffic they receive and how well they’re maintained. In high-traffic areas such as hallways or kitchens, signs of wear, such as dullness, scratches, or uneven patches, can appear sooner. Light polishing and regular resealing in between full restorations will help keep the floor looking fresh and reduce the need for more extensive work.
Is limestone suitable for underfloor heating?
Yes, limestone is compatible with underfloor heating systems when installed correctly. Its natural density helps distribute heat evenly across the surface, providing comfortable warmth underfoot. However, temperature changes should be gradual to avoid stressing the stone or grout. When using underfloor heating, make sure the limestone is adequately sealed to prevent moisture from the subfloor. from entering
Can I polish limestone myself?
Homeowners can handle light polishing with the right products, but deep restoration should be left to professionals. If you notice only minor dull patches or small scratches, a fine diamond pad and a pH-neutral polishing powder can refresh the finish. Always test on a small area first and avoid over-polishing, which can make the floor slippery or uneven due to widespread dullness or heavy wear. Professional honing and sealing will achieve better, longer-lasting results.
What’s the best cleaner for limestone floors?
The safest option is a pH-neutral stone cleaner made specifically for natural materials. These cleaners effectively remove everyday dirt and grime without damaging the surface or breaking down the sealant. Avoid acidic or bleach-based products, which can etch and discolour the stone. Dilute the cleaner as recommended, mop with a soft cloth, and dry the floor afterwards to prevent streaks.
Why does my limestone floor look patchy after cleaning?
Patchiness is often caused by uneven sealant wear or by cleaning product residues. If one area absorbs water or cleaning solution more than others, it may need resealing. Sometimes, leftover detergent can also cause streaks or dull spots. To fix this, thoroughly clean the surface with a diluted pH-neutral cleaner, then rinse well. If the problem persists, consider resealing or lightly honing the affected area to restore an even appearance.
Can I change the finish of my limestone floor?
Yes, it’s possible to change a limestone floor from a matte to a polished finish, or vice versa, through professional honing and polishing. This process removes a skinny layer of the surface, revealing fresh stone beneath. It’s an effective way to refresh older floors or update a room’s look. However, changing finishes also affects how you maintain the floor, as polished limestone will show marks more easily than honed surfaces.
Do limestone floors increase home value?
Well-maintained limestone floors often enhance a property’s value due to their timeless appearance and long lifespan. Buyers appreciate natural materials that reflect quality and craftsmanship. A restored and properly sealed limestone floor gives a strong first impression and signals that the home has been carefully maintained. While not every improvement guarantees a return, limestone’s appeal and durability make it one of the more desirable flooring choices in UK homes.
Recent Posts:
We work throughout the country, just some of our work counties:
Copyright © 2025 Abbey Floor Care. Tile And Natural Stone Cleaning Consultants FAQ - Privacy Policy - Terms And Conditions
Abbey Floor Care is a participant in the Amazon Services LLC Associates Programme, an affiliate advertising programme designed to provide a means for websites to earn advertising fees by linking to Amazon.co.uk. As an Amazon Associate, we earn from qualifying purchases.