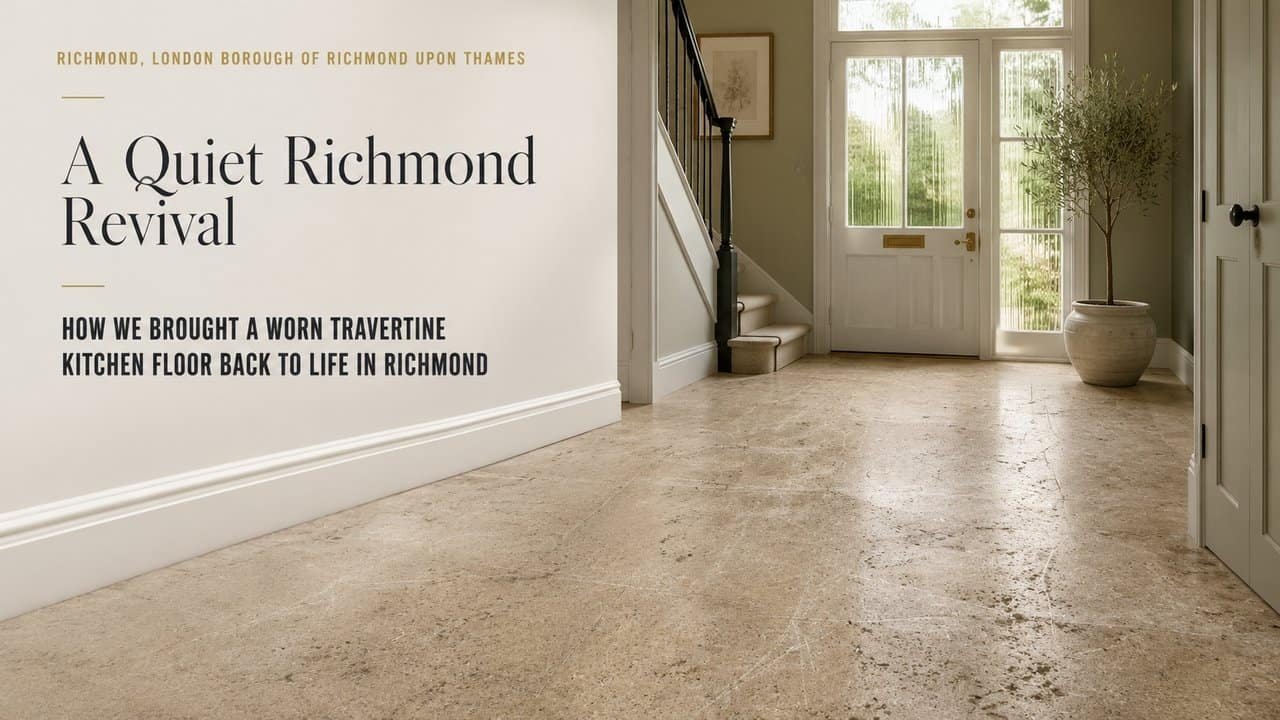
How We Brought a Worn Travertine Kitchen Floor Back to Life in Richmond
Last Updated on June 30, 2026 by David
Restoring a Living Space: The Richmond Travertine Story
When a natural stone floor runs through a busy kitchen and into a dining area, it becomes part of the home’s character — the thing everything else seems to sit around. But constant foot traffic, everyday spills and the shuffle of chairs gradually wear it down. That’s exactly what had happened to this 37‑square‑metre honed and filled travertine floor in Richmond, South West London. No matter how carefully the homeowner cleaned it, the usual domestic routine just wasn’t enough anymore.
Even with regular, meticulous mopping, the floor still looked tired, patchy and dark. This wasn’t simple surface dirt — the finish had worn away, soil had worked deep into the stone, and the original resin fills were breaking down. At that stage, real restoration means moving beyond basic cleaning and into deep diamond refinement and structural repair, giving the floor the fresh start it needs.
Anatomy of the Damage: How the Floor Started to Fail
Travertine is a beautiful, characterful stone — full of natural pores and mineral patterns — but it relies on a careful balance of smooth honing and strong filler to stay looking its best. On this Richmond floor, that balance had slipped, and four connected issues were showing up across the room:
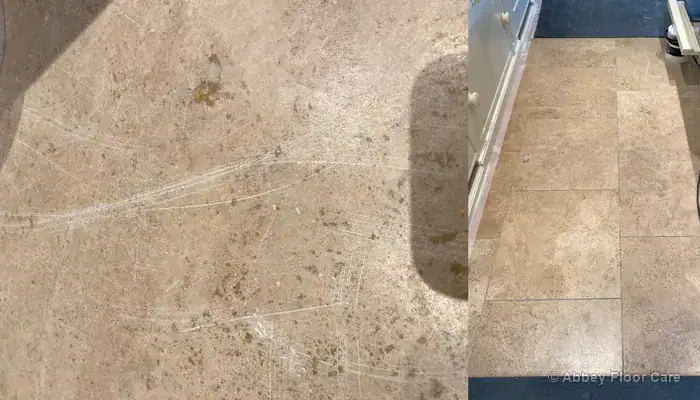
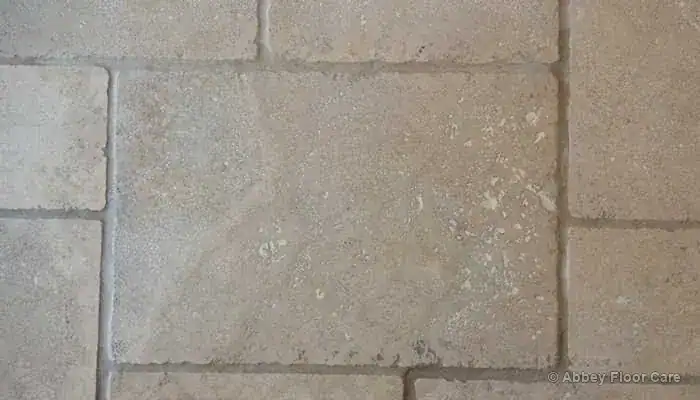
- Surface Finish Loss: Daily grit from the busy walkway between the kitchen and dining area had gently scratched the stone over time. The original mid‑sheen factory finish had faded into flat, grey lanes that no longer caught the light.
- Grout Contamination: Because the finish was worn, normal mopping acted more like a squeegee, pushing dirty water straight into the grout lines. What were once light beige joints had darkened into heavy lines that visually chopped up the space.
- Mechanical Scratching: Chairs, table legs and everyday movement had left pale arcs and drag marks across the floor. In low light, these scratches broke up the smooth look of the stone and made the surface appear dull.
- Pitting and Void Exposure: Travertine’s natural holes are normally filled at the factory, but years of foot traffic and harsh cleaning products had weakened those old repairs. As the filler broke away, small pits opened up, collecting soil and making the floor look darker and more worn than it really was.
The Restoration Strategy: Deep Cleaning, Careful Honing and Multi‑Stage Filling
To bring the floor back to its best without losing any of its natural character, we followed a precise, multi‑step restoration plan. Travertine of this age needs a gentle balance of thorough cleaning and careful mechanical refinement, so each stage was designed to lift out the damage while respecting the stone’s original feel.
Step 1: Lifting Out the Deep Dirt
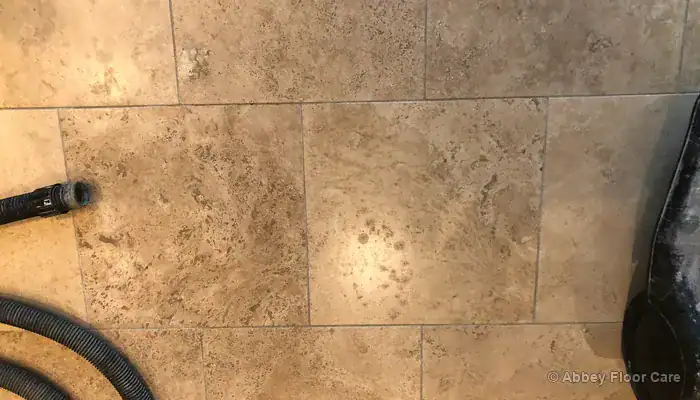
We started by giving the floor a thorough dry vacuum to remove loose grit. Then we applied a professional high‑alkaline cleaner to break down cooking films, old mop residues and the stubborn grime sitting deep in the stone. Using a heavy‑duty rotary machine with agitation brushes, we worked the solution right into the pores and grout lines. As the dirt lifted into a slurry, it was immediately rinsed away with high‑vacuum hot water extraction so none of the residue dried back onto the floor.
Step 2: Gentle, Controlled Diamond Honing
Once the surface was properly cleaned, we turned to the scratch pattern across the tiles. Standard rotary honing with 100–400 grit diamonds is effective, but it’s also aggressive — it removes the entire top layer of the stone, which would have exposed every natural void in this filled travertine.
To avoid that, we used a hand‑held honing machine with light, controlled pressure. This allowed us to work through the scratches without stripping away too much of the surface. After the marks were removed, we switched to the rotary machine with 800‑grit diamonds to start closing the stone, followed by 1500‑grit pads to blend everything together and restore a smooth, even satin finish.
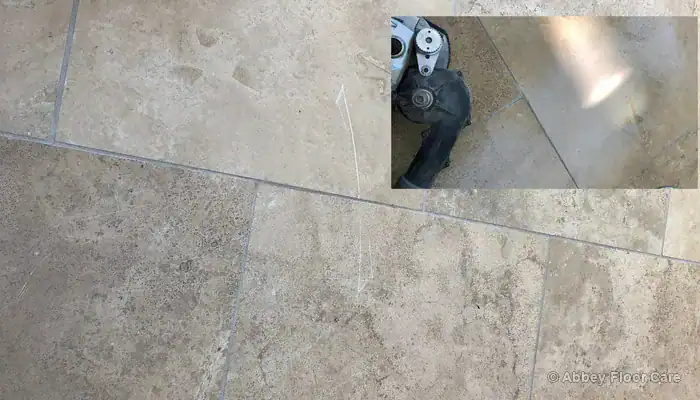
Step 3: Repairing the Stone and Preparing for Sealing
Honing can sometimes reveal tiny hidden voids beneath the surface of travertine, so we took time to carefully inspect every tile. Any open pits or missing factory fills were cleaned out, stabilised and rebuilt in stages using a colour‑matched filler, designed to blend naturally with the beige stone. This ensured the floor was fully repaired, level and ready for a long‑lasting protective seal.
Once the repairs had fully cured, we gently honed them so they sat perfectly level with the surrounding tiles. After that, we allowed the floor to dry right through, using a digital damp meter to confirm that no moisture remained beneath the surface before applying the protective sealer.
The Visual Outcome: Restoring the Smooth Satin Plane
The transformation of the Richmond kitchen and dining room highlights the profound difference between simply washing a floor and truly restoring the stone material.
| Floor Feature | Before Professional Intervention | After Professional Restoration |
|---|---|---|
| Traffic Lanes | Dull, flat, grey pathways running through the kitchen | Clear, even tiles with a soft satin sheen that reflects light beautifully |
| Grout Lines | Dark grout lines that broke up the room visually | Clean, light beige joints that blend naturally with the travertine |
| Tile Surface | Pale scratches, drag marks and scuffs from chairs and daily use | Smooth, scratch‑free tiles refined to a crisp 1500‑grit clarity |
| Natural Pits | Open voids collecting dirt and casting shadows | Fully repaired with colour‑matched filler, level and seamless with the surrounding stone |
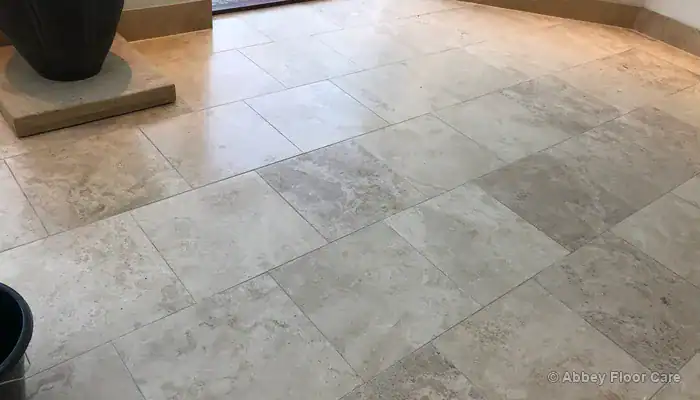
Now that the structural issues have been fixed, the floor finally looks the way it was meant to. With the surface honed smooth and properly sealed, it naturally resists spills and everyday dirt instead of holding onto them, so day‑to‑day cleaning becomes effortless.
Long-Term Maintenance and Broad Travertine Care Resources
To help your newly restored floor stay looking its best for years, a simple, steady care routine makes all the difference. A quick daily sweep or vacuum to lift away dry grit before you mop will protect the surface from unnecessary wear. When you do mop, stick to a gentle, pH‑neutral stone cleaner — everyday supermarket detergents are often too harsh, and over time they can dull the stone and weaken the protective seal.
It also helps to avoid steam mops. The intense, pressurised heat can break down specialist stone sealers and soften resin fills, which lets dirt work its way deeper into the stone. A little mindful care keeps the floor feeling clean, smooth and easy to live with.
For a deeper dive into managing natural stone installations, you can explore our comprehensive, site-wide guides:
- Review the complete blueprint for stone preservation in our main travertine restoration guide.
- Learn how to handle localized damage using our technical breakdown of travertine tile repair and hole filling.
- Discover the chemical reactions causing joint discoloration in our feature explaining why travertine grout turns black.
- See how regional water types and domestic settings affect stone long-term in modern travertine floor care for Surrey homes.

David Allen — Abbey Floor Care
David Allen has restored travertine and other natural stone floors across the UK for over 30 years through Abbey Floor Care. This Richmond, South West London case study documents how dull tiles, scratched areas, soiled grout, and missing filler were corrected on a kitchen and dining room floor.
Recent Posts:
We work throughout the country, just some of our work counties:
Copyright © 2025 Abbey Floor Care. Tile And Natural Stone Cleaning Consultants FAQ - Privacy Policy - Terms And Conditions
Abbey Floor Care is a participant in the Amazon Services LLC Associates Programme, an affiliate advertising programme designed to provide a means for websites to earn advertising fees by linking to Amazon.co.uk. As an Amazon Associate, we earn from qualifying purchases.