Travertine Repair Kit For Holes That Trap Dirt
Last Updated on July 10, 2026 by David
Open holes and failed filler in travertine floor tiles can usually be repaired with a small sanded-grout kit, as long as the opening has firm edges and no associated crack. The method is straightforward: remove the loose dirt, match the existing fill, pack the cavity firmly and finish the repair flush without aggressive scraping. Larger cavities, moving edges and widespread failures need professional assessment.
The method below covers inspection, preparation, filling, finishing and overnight curing.
What You Need When Travertine Holes Open
If an open travertine hole catches your fingertip or holds dark, gritty dirt, look closely at its edges before treating it as a simple filler repair. Vacuum the loose material from the opening first. Compacted debris can conceal a loose rim and make the damaged area look smaller than it actually is.
When you find one clean opening with firm stone around it, check whether the base remains solid under light fingertip pressure. Pale or crumbly material around the edge calls for a closer look at nearby tiles, as the original factory-applied compound may also have weakened in areas exposed to heavier foot traffic.
A narrow line continuing beyond the hole suggests a possible crack, so do not fill the visible pit immediately. The crack may cross the tile, follow a joint or sit alongside a loose edge. Each condition needs assessment before repair material hides the evidence. Surrey homeowners often notice these differences first in kitchens and entrance routes, where trapped dirt makes the openings easier to see.
Dark contamination simply shows where the cavity is mechanically collecting grit and mopping residue. The pitted travertine floor project in Nantwich provides useful context for recognising extensive openings, although one isolated pit is a much smaller task. A household repair should go ahead only when the rim, base and surrounding tile all feel stable.
Which Holes You Can Fill Without Specialist Tools
A small, stable travertine hole will usually have firm edges when pressed gently with a fingertip. Loose stone or a deep shadow beneath the opening makes the repair less predictable. View the cavity with light coming from two directions, because a single shadow can conceal an undercut edge and make a deep opening appear shallow.
Suitable for household filling: a localised pit with a solid base, a firm perimeter and no crack extending into the surrounding tile. Travertine formed around natural cavities as mineral-rich spring deposits released carbon dioxide, leaving geological holes within otherwise dense stone. So a small opening can expose an inherent feature without meaning the tile itself has become unstable.
Needs professional assessment: an opening with a crumbling rim, moving stone, a deep unsupported cavity or a line continuing beyond the pit. The tile carries a thin calcite layer above its internal holes, and damage to that layer can uncover a larger cavity beneath. London installations with underfloor heating also need careful checking where cracks could relate to movement rather than a missing surface fill.
Older factory-applied material can wear faster than the surrounding stone along busy routes, leaving newly exposed voids as the filler is lost. The small-hole travertine repair method distinguishes manageable pits from damage requiring specialist tools, with examples that help establish a practical boundary. Firm, isolated holes suit the household method. Recurring or connected damage does not.
Widespread openings often call for a detailed survey and selective refilling across a much larger area. The Haslingden whole-floor travertine project shows why extensive damage requires professional intervention on a different scale. One local repair kit cannot produce a uniform result when numerous fills have broken away.

How to Fill Small Travertine Holes
Aggressive scraping around a travertine hole can quickly turn a firm opening into a chipped one. The safer approach starts with a clean void, a gentle touch and firmly pressed grout. A suitable repair area should contain one stable pit, with no loose stone, continuing cracks or movement under light pressure.
Sanded cement-based grout is a controllable household filler for small cavities because it can be packed firmly and wiped level before it cures. A close colour match makes the finished patch less conspicuous, whilst the aggregate gives the set compound useful body without the need for grinding equipment.
The finished repair should close the dirt-catching recess, sit flush with the surrounding surface and remain undisturbed overnight. In my experience, careful preparation gives a noticeably better result than pressing material over embedded grit. And a properly finished patch takes less effort to keep clean than an open hole.
Gather the Repair Kit
For a small repair, you will need sanded grout in a suitable shade, clean water or the manufacturer-approved polymer additive, electronic kitchen scales, disposable cups, plastic spoons, vinyl gloves, a soft brush, a vacuum nozzle and two clean microfibre cloths. A decorating knife can help with a broader opening, but use its edge to spread the material rather than scrape the stone.
Choose the colour by following the existing filler, not the darkest or lightest mineral marking in the tile. Test a small amount and let it dry, because wet grout looks darker. A Jasmine or similar warm neutral shade often suits beige UK domestic floors, although the surrounding fill is still the most reliable reference.
Prepare the Stable Opening
A gritty or dark hole needs dry preparation before any new compound goes into it. Vacuum the opening with a narrow nozzle, loosen only detachable particles with a soft non-abrasive brush, then vacuum again. Do not enlarge the cavity or lever at its edges.
Where grime remains around the rim, clean locally with a lightly dampened cloth and an acid-free, pH-neutral stone cleaner. Acidic bathroom products, vinegar and lemon juice dissolve the calcite surface, leaving pale, rough or cloudy damage that washing cannot reverse. Let the cavity dry fully before filling so that water does not interfere with the grout consistency.
Once prepared, the opening should reveal a firm base and clean perimeter without loose fragments. The Chinnor cleaning and repair project illustrates how contamination removal and selective filling work together across a larger floor. Household preparation applies the same principle on a much smaller scale, without specialist extraction.
- Measure and mix a small batch. Put one to three teaspoons of sanded grout into a disposable cup, then add the manufacturer-specified weight of clean water or approved additive. Mix thoroughly until you have a stiff, even paste. Why this matters: accurate proportions prevent either a wet, weak fill or a dry mixture that cannot bond throughout the cavity.
- Allow the grout to slake. Leave the mixed compound undisturbed for about five minutes, then remix it without adding more liquid. Why this matters: slaking allows moisture to penetrate the cement and aggregate fully. Adding extra water after the mixture stiffens can weaken the cured repair and make it more likely to break away.
- Press the grout into the hole. Use the back of a plastic spoon or a gloved fingertip to force the mixture firmly into the base and beneath the inner edges. Add small amounts until the opening is completely packed. Why this matters: firm compaction prevents you from creating a shallow skin over an unfilled recess.
- Level the repair gently. Draw the spoon or decorating knife across the patch without digging into the surrounding stone. Leave the fresh fill fractionally proud rather than hollow. Why this matters: the later cloth wipe will remove a slight excess safely, whereas a recessed patch will continue to collect dirt.
- Wait for the surface haze. Leave the repair for approximately five to ten minutes, until the residue around it turns opaque and the fill resists light fingertip pressure. Why this matters: wiping too early pulls soft material out of the cavity, but waiting too long makes the excess grout harder to remove.
- Wipe the patch flush. Use a well-wrung damp microfibre cloth, passing it across the opening with light, flat strokes. Rinse and wring the cloth as necessary without flooding the repair. Why this matters: controlled wiping removes the haze and levels the patch without aggressive scraping.
- Remove dry residue and cure overnight. Once the surface has firmed, vacuum the loose dust around the area. Then protect the repair from foot traffic, washing and underfloor-heating changes until the next day. Why this matters: uninterrupted curing allows the cement-based fill to develop strength and remain securely seated.
Mix and Slake the Grout
If the mixture runs from the spoon, it contains too much liquid and should not go into the hole. Electronic scales give better control over gram-level quantities than estimating a few drops, particularly when the kit will be used to prepare many small batches over time.
Mixing distributes the liquid throughout the dry compound, whilst the five-minute rest completes the wetting process before the final remix. Do not add water when the paste stiffens during this period. Dilution changes the cured structure and raises the risk of early filler loss.

Pack the Hole Firmly
A lightly covered opening can look complete whilst still hiding an unsupported pocket underneath. Press the grout down and towards every inner edge with the back of a spoon, working in small additions until no depression reappears.
Firm packing creates a structural fill throughout the accessible cavity, rather than a cosmetic cap across its mouth. Apply enough pressure to compact the material without levering against the thin rim around the opening.

Level Broader Repairs Without Scraping
A broader but still stable pit may need a decorating knife to spread the mixture across its full width. Hold the blade almost flat, move it over the fill with minimal pressure and keep the corners clear of the surrounding surface.
This flat spreading action restores the local surface plane without cutting into the stone or disturbing its rim. Sharp scraping can leave scratches, chip a thin edge or expose more of the cavity. At that point, a manageable repair can become specialist work.

Wait for the Correct Wiping Point
A shiny, wet smear around the repair tells you that the grout is still too soft to finish. Wait until the residue becomes pale and opaque, usually after five to ten minutes, and check that the central fill no longer moves under a very light touch.
The visible haze marks the practical point when a damp cloth can remove surface residue without drawing much compound out of the hole. Room temperature, batch size and ventilation can all affect the timing, so judge the appearance rather than relying on the clock alone.

Wipe the Filler Flush
A raised patch will catch cloths and footwear. A recessed one will hold dirt. Pass a well-wrung microfibre cloth over the repair using broad, light strokes, then inspect the height after each pass instead of rubbing the area repeatedly.
Controlled wiping removes the excess compound and blends the edge of the colour-matched patch into the existing surface. Keep the cloth damp rather than wet, as excess water can wash cement from the fresh fill and weaken its face.

Remove Residue and Allow Overnight Curing
Even a finished patch needs protection whilst its cement binder hardens. Vacuum away the loose dry residue, keeping the nozzle clear of the repair, then prevent foot traffic, wet cleaning and sudden heating changes until the following day.
Overnight curing gives a harder, longer-lasting fill than an early return to use. Once cured, a nearby dry cloth should glide across the repair without catching, although the final colour may continue to lighten as the remaining moisture leaves.

What a Successful Repair Should Look Like
If your travertine shows a level patch that does not catch a fingertip or dry cloth, the cured fill is probably sitting at the right height. Cast light across the repair from two opposing directions. Ordinary overhead lighting can hide a slight recess or raised edge.
The fill should close the entire opening and meet the surrounding thin stone layer without loose margins. There should be no dark central recess, crumbly perimeter or movement under gentle pressure, as these signs point to incomplete packing or an unstable edge.
It should resemble the surrounding factory fill without trying to reproduce every vein or variation in shade. Nor should it form a conspicuous pale island or dark patch. A close colour match allows the repair to settle visually into the floor whilst preserving the geological character of the natural stone.
After dry buffing, the repair should feel clean and flush. Heavy grout haze should not remain across the adjoining tile, because dried residue leaves a dull surface film that requires careful removal rather than aggressive abrasion.
A sound local repair closes the dirt trap and restores a practical walking surface, but it will not make an aged tile look factory-new. The Hull travertine project shows how open pits and stable filled areas influence the overall clarity of a floor. The repaired opening should no longer behave as an exposed, dirt-catching cavity.

If residue remains around the finished repair, use a residue-free, pH-neutral stone cleaner only where it is needed. Avoid acidic cleaners, as they dissolve the stone and attack cement-based filler. Broader travertine repair guidance explains the appropriate route for other floor conditions. The completed patch should remain flush, stable and free from residue.
When Widespread Holes Need Professional Repair
Repeated filler loss, leaving several gritty openings underfoot, is beyond the scope of a single-hole repair—particularly when you can also feel cracks or loose edges. Photograph and mark every recurring location before requesting an assessment. The pattern provides more useful evidence than one newly opened void.

Escalate the repair when openings extend across several tiles, previous patches repeatedly break away or cavities run beneath unsupported edges. Specialist resin can stabilise selected pits, but its short working time and finishing requirements put it outside this household method.
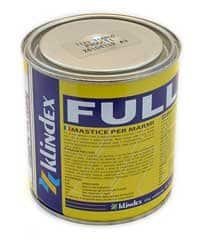
Cracks, moving fragments and loose tiles also need escalation, because filler alone cannot correct underlying movement. Epoxy-based material combines resin and hardener to produce a durable crack fill, but a professional must first establish why the damaged area opened.
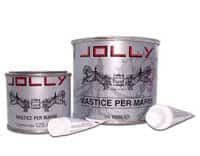
Whole-floor failure needs a planned repair route, not a succession of spot fills. The travertine flooring care, cleaning, repair and restoration hub connects wider symptoms with the appropriate professional approach. Correct assessment leads to a more uniform finish and a floor that is significantly easier to clean and maintain.

David Allen — Abbey Floor Care
David Allen has worked with travertine floors through Abbey Floor Care for over 30 years. That experience informs this correctly sequenced method for inspecting, preparing, filling and finishing occasional holes without unnecessary specialist tools.
Recent Posts:
We work throughout the country, just some of our work counties:
Copyright © 2026 Abbey Floor Care. Tile And Natural Stone Cleaning Consultants FAQ - Privacy Policy - Terms And Conditions
Abbey Floor Care is a participant in the Amazon Services LLC Associates Programme, an affiliate advertising programme designed to provide a means for websites to earn advertising fees by linking to Amazon.co.uk. As an Amazon Associate, we earn from qualifying purchases.