Best Way To Clean Quarry Tiles
Quarry tiles are a classic flooring choice found in everything from Victorian hallways to rustic kitchens. Their rich tones and durable nature make them a favourite in older homes and heritage properties. But over time, these tiles can lose their charm—fading, staining, or becoming dull due to ingrained dirt, worn sealers, or moisture issues.
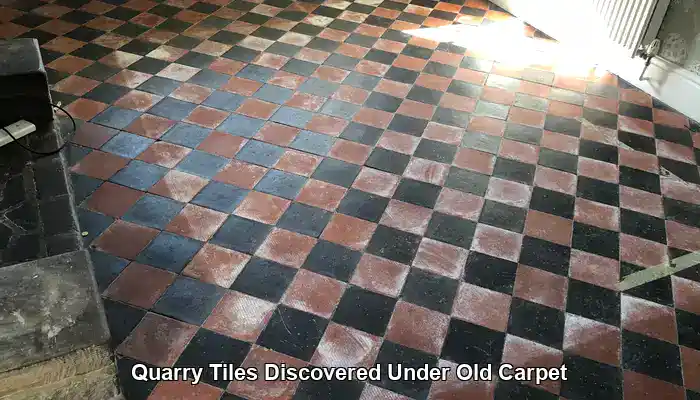
Whether your quarry tiles are newly discovered under old carpet or have been part of your home for decades, restoring them properly requires more than just a mop and bucket. The cleaning and sealing process must be tailored to the tile’s condition, its finish, and the way it was installed—especially in homes without a damp-proof membrane (DPM).
This guide walks you through the best way to clean and seal quarry tiles, step by step. From identifying whether your tiles are glazed or unglazed, to choosing the right products and techniques, you’ll learn how to bring out the natural beauty of your floor while protecting it for years to come.
Pro Tip: We recommend these products for daily Quarry maintenance cleaning.

Fila Pro Floor Cleaner
|

LTP Floorshine
|

Vileda H2PrO Spin Mop System
|
Let’s start with the most crucial step: a thorough inspection.
Initial Inspection
Before any cleaning or sealing work begins, a thorough inspection of the quarry tile floor is essential. This step helps identify the tile’s condition, its installation context, and any factors that will influence the cleaning method and choice of sealer. Skipping this stage can lead to poor results, premature sealer failure, or even damage to the tiles.
🔍 Check for Surface Condition
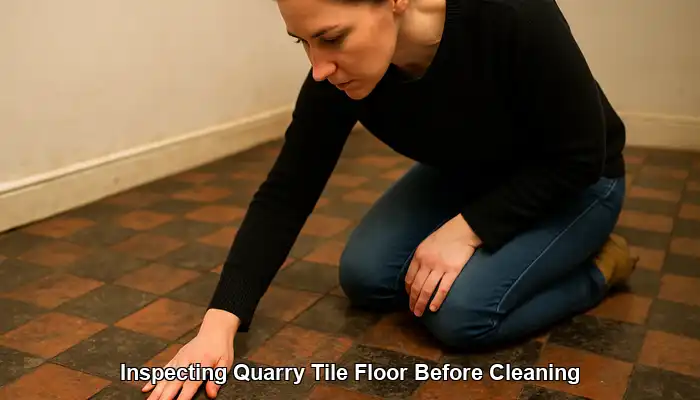
Start by assessing the overall appearance of the tiles. Are they faded, stained, or patchy? Is there evidence of ingrained dirt or surface wear? These signs will help determine the strength of the cleaner required and whether any stripping agents are needed to remove old sealers or waxes.
Look closely at the grout lines, too. Grout often holds more dirt than the tile surface and may require targeted scrubbing or separate treatment.
🧱 Check for Glazed Finish
Not all quarry tiles are unglazed. Some—primarily decorative or Victorian-style tiles—have a glazed finish that gives them a smooth, shiny, and often slightly reflective surface. Glazed tiles are less porous and do not absorb sealers in the same way as unglazed tiles.
Common examples of glazed quarry tiles include:
- Victorian hallway tiles with a glossy red or brown surface
- Kitchen tiles with a semi-gloss protective layer
- Border tiles with a glass-like sheen
To test for glaze, lightly spray water onto the tile. If the water beads up and doesn’t soak in, the tile is likely glazed. These tiles typically do not require sealing. Instead, focus on deep cleaning with pH-neutral products and maintaining the glaze with regular care.
🏠 Check for Damp-Proof Membrane (DPM)
One of the most critical checks—especially in older properties—is whether the quarry tiles are laid directly onto the ground without a damp-proof membrane (DPM). Many traditional homes, cottages, and period properties lack a DPM, which means moisture can rise through the substrate and affect the tiles from below.
This has a direct impact on the sealing strategy:
- If no DPM is present, avoid non-breathable or surface sealers. These can trap moisture, leading to whitening, flaking, or sealer failure.
- Instead, use a breathable impregnating sealer that allows moisture vapour to pass through while protecting the tile surface. Products like LTP MPG Sealer H20 or LTP Colour Intensifier are ideal in these cases.
If you’re unsure whether a DPM is present, look for signs of dampness, efflorescence (white salt deposits), or patchy discolouration. You can also use a moisture meter for a more accurate reading.
By identifying the tile type, finish, and installation context, you ensure that every subsequent step—from cleaning to sealing—is tailored to the floor’s specific needs.
Surface Preparation
Once the initial inspection is complete, it’s time to prepare the quarry tile surface for cleaning. Proper preparation ensures that cleaning products work effectively and that sealers bond correctly to the tile. Skipping this step can lead to patchy results, poor stain removal, or premature sealer failure.
🧹 Remove Loose Dirt and Debris
Begin by sweeping or vacuuming the entire area to remove dust, grit, and loose particles. Pay special attention to corners, grout lines, and edges where debris tends to accumulate. If the floor has been covered with carpet or vinyl, remove any adhesive residues using a scraper or appropriate solvent.
🛡️ Protect Surrounding Surfaces
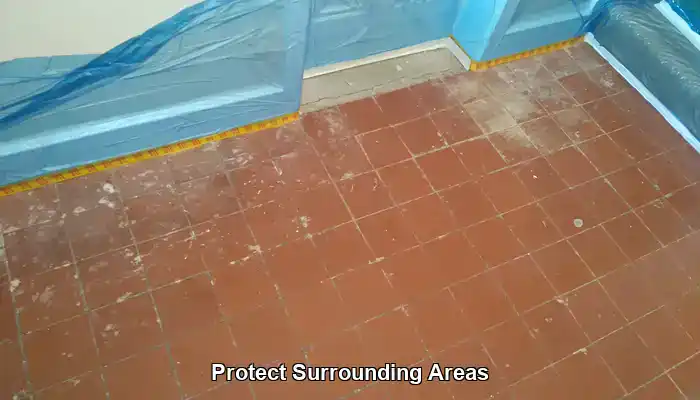
Mask off skirting boards, door frames, and adjacent flooring with painter’s tape or plastic sheeting. This prevents cleaning agents or sealers from splashing onto surfaces that could be stained or damaged. In kitchens or hallways, consider using dust sheets to protect furniture and nearby fixtures.
🧽 Pre-Wet the Surface (Optional)
For heavily soiled floors, lightly pre-wetting the tiles with clean water can help prevent cleaning solutions from drying too quickly. This is especially useful when working in warm or draughty environments.
🧪 Spot Test Cleaning Products
Before applying any cleaner or sealer across the whole floor, perform a spot test in an inconspicuous area. This helps confirm compatibility with the tile and ensures there’s no adverse reaction—significant for older quarry tiles with unknown treatments or finishes.
⚠️ Safety First
Wear gloves and ensure good ventilation when using chemical cleaners or sealers. If using machinery, check that pads and brushes are suitable for quarry tiles to avoid scratching or gouging the surface.
With the surface properly prepared, you’re ready to move on to deep cleaning and restoration.
3. Deep Cleaning
Once the quarry tile surface is prepared correctly, the next step is deep cleaning. This stage is essential for removing ingrained dirt, surface waxes, and any residues that could interfere with sealing. A thorough clean not only restores the tile’s natural colour and texture but also ensures the sealer bonds effectively and performs as intended.
🧼 Start with a Strong Alkaline Cleaner
Begin by applying a powerful alkaline cleaner such as LTP Grimex, which is specifically designed to break down heavy soils, grease, and surface waxes. This product is ideal for quarry tiles, which often suffer from years of grime build-up—especially in kitchens, hallways, and older properties.
Dilute Grimex according to the manufacturer’s instructions and apply generously across the floor. Allow the solution to dwell for 5–10 minutes to penetrate the dirt, but don’t let it dry out—keep the surface damp during this time.
🧽 Choose the Right Tools
Professional tile cleaners typically use a rotary scrubbing machine fitted with a medium-grade brush. This equipment delivers consistent pressure and agitation, making light work of stubborn grime and saving a great deal of elbow grease.
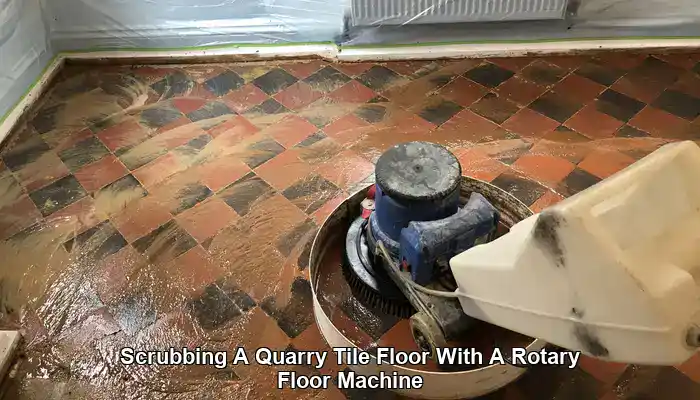
For homeowners tackling the job themselves, a stiff deck scrub brush or a black cleaning pad is a practical alternative. These tools provide enough abrasion to lift dirt without damaging the tile surface.
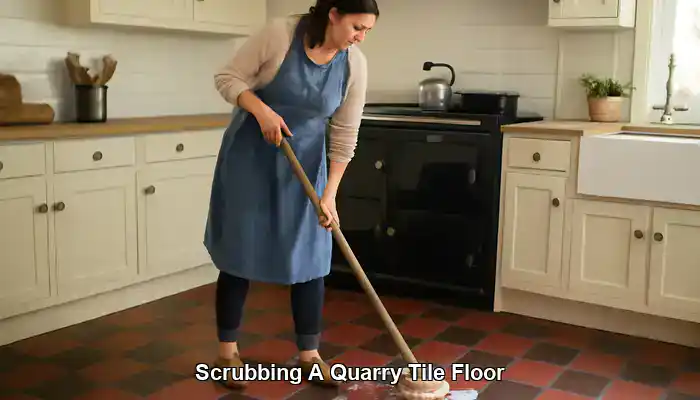
Work methodically across the floor, focusing on grout lines and textured areas where dirt tends to accumulate.
💧 Rinse Thoroughly
After scrubbing, rinse the floor thoroughly with clean water to remove loosened dirt and cleaner residue. Use a wet vacuum to extract the slurry, or mop up with absorbent cloths. Repeat the rinse if needed—any leftover cleaning solution can interfere with the sealing process.
🧪 Assess for Residual Sealers or Waxes
Once the tiles are clean and dry, inspect the surface for any remaining synthetic sealers or wax coatings. These may appear as shiny patches, streaks, or areas that resist water absorption. If residues persist, apply LTP Solvex, a solvent-based remover designed to strip stubborn sealers and waxes.
Solvex should only be used where Grimex has not entirely removed the coating. Apply it in small sections, agitate gently with a brush or pad, and allow it to dwell before rinsing thoroughly. Always follow safety guidelines when using solvent-based products, including good ventilation and protective gloves.
⏳ Allow to Dry
After cleaning and any necessary stripping, allow the floor to dry completely—ideally for 24 to 48 hours. This drying period is critical in properties without a damp-proof membrane (DPM), where moisture can rise from the substrate. A dry surface ensures the sealer penetrates evenly and performs reliably.
With the tiles now clean, residue-free, and dry, you’re ready to move on to sealing—bringing out the natural beauty of the quarry tiles while protecting them for years to come.
Sealing
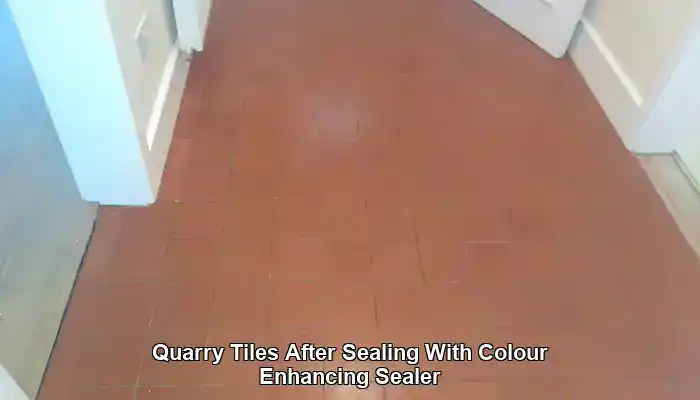
Once the quarry tiles are clean, dry, and free from residues, it’s time to seal the surface. Sealing helps protect the tiles from staining, moisture ingress, and wear—especially in high-traffic areas like hallways and kitchens. The type of sealer used should be carefully matched to the tile’s condition, finish, and installation context.
🛡️ Choose a Breathable Impregnating Sealer
For most quarry tile floors—especially those in older properties without a damp-proof membrane (DPM)—a breathable impregnating sealer is essential. These sealers penetrate the tile and allow moisture vapour to pass through, preventing issues like whitening, flaking, or sealer failure caused by trapped moisture.
Two excellent options include:
- LTP MPG Sealer H20 – Offers a natural, matt finish while protecting against water and oil-based stains.
- LTP Colour Intensifier – Enhances the tile’s natural colour with a richer tone, while still allowing the surface to breathe.
Apply the sealer in thin, even coats using a microfibre cloth, sponge applicator, or soft brush. Allow each coat to dry thoroughly before applying the next—typically 1 to 2 hours between coats. Most quarry tile floors require two coats, but highly absorbent tiles may benefit from a third.
🧪 Optional: Add a Topical Sealer (Only If a DPM Is Present)
If the floor has a DPM, you can add an extra layer of protection by applying a topical sealer over the impregnating sealer. This creates a satin or gloss finish and adds surface durability, especially in busy areas.
Recommended options include:
- LTP Ironwax Satin – Provides a soft sheen and added resistance to scuffs and stains.
- LTP Ironwax Gloss – Delivers a high-shine finish for a more polished look.
However, if you’re unsure whether a DPM is present, it’s best to avoid topical sealers altogether. These products form a surface film that can trap rising moisture, leading to cloudy patches or peeling over time.
Ongoing Maintenance
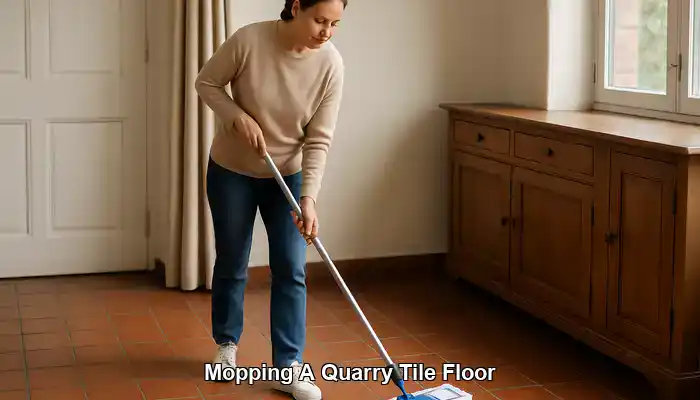
Once your quarry tiles have been cleaned and sealed, regular maintenance is key to preserving their appearance and protecting the finish. The type of cleaner you use should match the type of sealer applied—whether it’s a breathable impregnating sealer or a topical surface coating.
🧼 For Floors Sealed with an Impregnating Sealer
Suppose your tiles have been sealed with a breathable impregnating product like LTP Mattstone or LTP Colour Intensifier. In that case, the goal is to clean without disrupting the protective layer within the tile. These sealers work below the surface, so harsh chemicals or acidic cleaners can degrade their performance over time.
Use a pH-neutral cleaner such as:
- Fila Pro Neutral Floor Cleaner – A concentrated, residue-free formula suitable for sealed stone surfaces.
- LTP Waxwash – A gentle cleaner that also helps maintain the finish and extend the life of the sealer.
Dilute according to instructions and mop as needed. For routine cleaning, once or twice a week is usually sufficient. Avoid steam cleaners, bleach, or acidic products, which can strip the sealer and damage the tile.
✨ For Floors with an Additional Topical Sealer
If your floor has a topical sealer applied over the impregnating layer—such as LTP Ironwax Satin or LTP Ironwax Gloss—you’ll need a cleaner that maintains the surface film without dulling or streaking.
Recommended products include:
- LTP Floorshine – A pH-neutral cleaner that enhances the sheen and protects the surface coating.
- Lithofin Easy Care – Designed for regular use on sealed stone and tiled surfaces, helping to preserve gloss and reduce wear.
These cleaners are ideal for high-traffic areas and floors where a satin or gloss finish has been applied. They help maintain the protective layer while keeping the surface looking fresh and vibrant.
🧽 General Tips
- Use doormats at entrances to reduce tracked-in dirt and grit.
- Wipe up spills promptly to prevent staining.
- Avoid abrasive pads or brushes that could scratch the surface.
- Reapply topical sealers every 6–12 months if needed, depending on traffic and wear.
⚠️ If in Doubt…
If you’re unsure whether a topical sealer has been applied—or whether the floor has a damp-proof membrane—stick with pH-neutral cleaners and avoid surface coatings. This ensures you don’t trap moisture or compromise the tile’s breathability.
With the proper maintenance routine, your quarry tile floor will stay protected, easy to clean, and visually appealing for years to come.
Recent Posts:
We work throughout the country, just some of our work counties:
Copyright © 2025 Abbey Floor Care. Tile And Natural Stone Cleaning Consultants FAQ - Privacy Policy - Terms And Conditions
Abbey Floor Care is a participant in the Amazon Services LLC Associates Programme, an affiliate advertising programme designed to provide a means for websites to earn advertising fees by linking to Amazon.co.uk. As an Amazon Associate, we earn from qualifying purchases.