
Restore Travertine Floors? When Mopping Stops Working
Last Updated on July 11, 2026 by David
Scratches, dull patches and failed filler can often be improved without a full professional refinish, but the safe DIY boundary is narrow. A lightly soiled travertine floor can be improved through controlled cleaning, small cosmetic repairs, thorough slurry removal, careful drying and suitable sealing. Etching, uneven tiles, deep cracks, heavy coatings and resin-quality repairs need specialist assessment.
The method below keeps each stage controlled, so cleaning does not create extra residue, excess moisture or surface damage.
What You Need When Mopping No Longer Works
How can you tell when a travertine floor needs more than another mop? Check it once dry, then run clean fingertips across several tiles and grout lines. Grey traffic areas, dark holes, a sticky drag or an uneven sheen usually mean the floor is holding soil, detergent residue or an old surface treatment that ordinary washing can no longer remove. A tacky patch is especially likely to be cleaner or sealer residue — increasing the strength of a household product can make the floor harder to recover.
- A vacuum or Hoover with a soft floor head for loose dirt and grit
- An acid-free stone cleaner, clean bucket, warm water and soft microfibre mop
- A soft nylon brush for controlled agitation around pits and grout recesses
- A wet vacuum or slurry extractor with a clean recovery tank and clear suction path
- Colour-compatible cement grout, a small putty knife and soft cloths for limited cosmetic filling
- Dry towels, ventilation, a damp meter where available and a suitable penetrating or surface sealer
Assemble the whole kit before wet work starts, and test the extraction equipment with clean water first — confirm the tank is empty and suction stays steady. Poor recovery can leave a restored area looking grey again once it dries, because dirty solution has stayed along grout edges or been drawn into neighbouring holes.
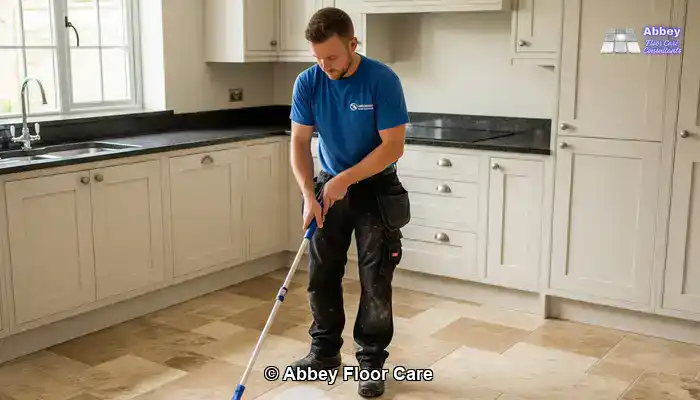
Where dark deposits sit inside the natural openings, cleaning soil trapped in travertine holes covers how to compare the condition before choosing a method. A dull floor may instead have a worn honed finish, acid etching or a failing coating — none of which a stronger cleaner will fix.
What Can Damage Travertine During DIY Work
Avoid anything acidic, excessively wet, aggressively abrasive, or that leaves an unidentified surface film. Travertine is calcium carbonate stone, so vinegar, descaler, wine, fruit juice and acidic bathroom products chemically dissolve its surface rather than cleaning it. Once acid leaves a pale, cloudy or rough area, the calcite finish has physically changed — no amount of washing or polish will rebuild it. Only controlled honing, removing the affected layer evenly, corrects it.
The natural holes in travertine can all collect loosened grime. Saturating cavities, cracks or failed fills lets dirty solution travel beyond the area being cleaned, which is why a small dark spot can spread or reappear as the floor dries.
Travertine can look cleaner while becoming harder to restore safely if acids, abrasive tools or excess moisture alter the surface.
Two further conditions sit firmly outside DIY scope. Lippage is a height difference between adjacent tiles from installation variation or floor movement — footwear catching or a ridge underfoot are the signs. Correction needs controlled diamond honing across the high points, then refinement of the wider surface. Heavy or failing coatings — streaky, cloudy or sticky film-forming products applied over moisture or old residue — need identifying and, where necessary, stripping under controlled conditions; see removing old travertine sealers safely.
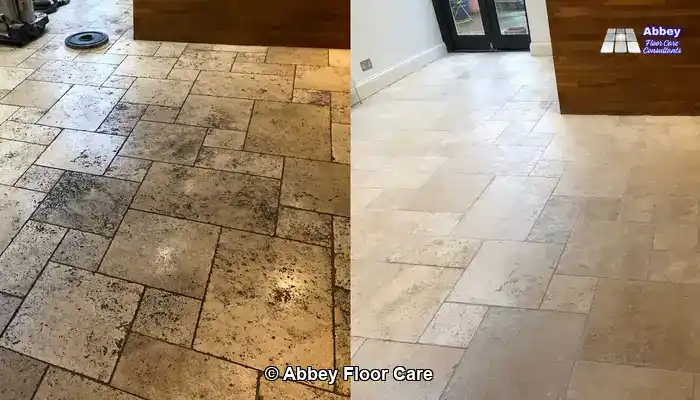
A homeowner method should stay limited to diagnosis, stone-safe cleaning, extraction, occasional cosmetic filling, complete drying and compatible sealing. Escalate etching, lippage, widespread cracking, heavy coatings and any cavity needing bonding resin, as the dedicated travertine hole and crack repair method makes clear.
How to Restore the Floor Step by Step
If the floor feels draggy or shows dark pits under angled light, mark those areas before applying any cleaner so you can recheck them once dry. Extraction is what separates this process from mopping — dirty solution must leave the floor rather than be pushed into grout edges and cavities. Done well, the stone regains clearer colour, though worn calcite and etching will still be visible afterwards.
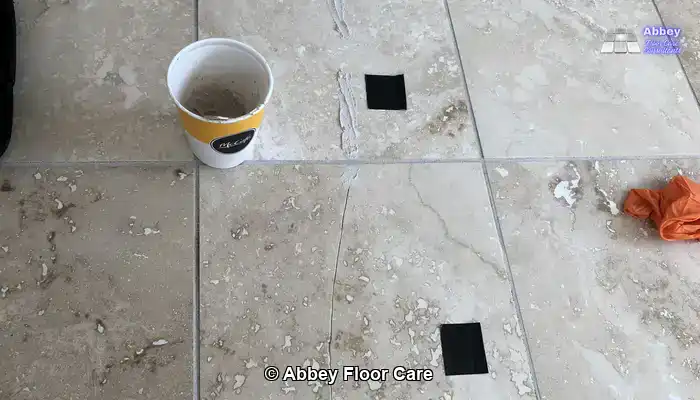
1. Decide Whether the Floor Is Dirty, Damaged or Coated
Examine the floor dry, using clean fingertips and a low, angled light. Mark draggy areas, blackened pits and sticky shine so you can compare the same spots after cleaning. A tacky, marking gloss is likely a topical sealer rather than the stone’s natural finish; fine lines and fuzzy reflections under a low torch are micro-scratching, which needs diamond honing rather than washing. Continue only where removable contamination is the dominant condition — loose tiles, long cracks or widespread loss of finish mean professional assessment instead.
2. Test Every Product Before Treating the Whole Floor
Test each product on a hidden tile and let it dry fully before continuing — reject anything that leaves the patch pale, rough, tacky or unusually glossy. Start with an acid-free, pH-balanced stone cleaner; never substitute vinegar, limescale remover or descaler, even on marks resembling hard-water deposit — the “cleaning” action may be etching the stone.
3. Remove Dry Grit Before It Becomes an Abrasive
Vacuum the whole room first, then use a soft brush around skirting edges, open holes and grout lines, paying extra attention to entrances where tracked-in grit accumulates. Don’t begin wet cleaning while grit is still audible or felt underfoot, and stop if the vacuum head scuffs the surface or pulls loose factory filler.
4. Clean in Sections You Can Rinse and Extract Quickly
Keep each section small enough to stay wet through applying, agitating, rinsing and full recovery. Dilute exactly as directed and don’t flood open pits or cracks — excess liquid only creates more slurry to remove. Reduce the working area in warm rooms rather than changing the concentration, and stop if the surface turns chalky or an old coating starts softening.
5. Agitate the Dirt Without Attempting to Refinish the Stone
Use a soft nylon brush on dark grout edges and shallow holes, with enough pressure to release soil without cutting the calcite or dragging out weakened filler. Give traffic lanes several light passes rather than one aggressive treatment. A low-speed rotary machine can even out agitation in experienced hands, but an unfamiliar machine used as a shortcut can leave swirl marks and exposed cavities.
6. Extract the Slurry Instead of Mopping It Back In
Recover the slurry with a wet vacuum while it’s still mobile, passing over each section in more than one direction to reach recessed grout and shallow cavities. Continue until the recovery water runs clearer and a white cloth no longer picks up grey residue. Persistent black pits after repeated extraction may be beyond domestic equipment — see the professional explanation of persistent travertine dullness and dark pits.
7. Repair Only Clean, Shallow and Stable Cavities
Limit home repairs to shallow cavities that are clean, dry, firm-edged and separate from any moving crack. Press colour-compatible cement grout in firmly, level it flush and wipe away residue, then let it cure fully without rinsing or early use. Deep voids and fills needing invisible colour matching are specialist work.
8. Keep Rinsing Until the Stone Is Free of Residue
Wipe the rinsed surface with a clean white cloth, checking for foam or transferred residue before it dries — leftover cleaner can form a cloudy film. Repeat rinsing from crossing directions until the recovery liquid runs clear. A steam mop is not a substitute for this step, and if each pass releases more of an old coating, that needs controlled stripping rather than more washing.
9. Let All Retained Moisture Leave Before Sealing
Wait until tiles, grout and any new fills return to an even, stable dry colour — this can take overnight or longer, since a tile face can feel dry while deeper voids still hold water. Keep steady airflow rather than direct heat, and treat recurring damp as something to investigate before sealing.
10. Match the Sealer to the Stone and Existing Treatment
Test the fully dried floor first — a water drop that darkens rapidly shows open pores, while beading that holds for several minutes shows residual protection. A penetrating impregnating sealer works below the surface without a visible coating; remove all excess before curing, and don’t expect it to disguise scratches. A film-forming topical treatment can unify the look of filled travertine but must never go over dampness or an unidentified coating — see choosing a travertine sealer for long-term protection.
11. Assess the Result After Full Curing
Judge the result only once the sealer’s stated cure time has passed, in ordinary light and again raked low across the tiles — colour should be more even and fills stable, with no dragged shine or plastic-looking film. Tacky areas usually mean excess sealer; remove it only by the manufacturer’s approved method rather than adding another coat. Maintain the result with regular grit vacuuming and a residue-free pH-neutral cleaner, avoiding steam on a topical treatment — see steam cleaning travertine floors safely.
What a Safe DIY Result Should Look Like
A well-controlled home restoration leaves travertine cleaner, drier, more evenly coloured and better protected — but it will not reproduce professional refinishing where the surface is etched, scratched or uneven. A safe result shows less ingrained greyness and clearer grout without a detergent film; small grout fills stay stable, and raking light shows no tacky streaks or coating lines. Fresh repairs may stay temporarily darker as moisture leaves the cement, so judge final colour only after full curing.
A condition that still needs professional restoration stays dull after thorough extraction, or shows the etching, lippage and coating problems covered in Section 2. Deep voids and fills needing seamless colour matching also fall outside cosmetic grout, requiring specialist cavity preparation and bonding resin.
When Travertine Problems Go Beyond DIY
Stop when stone-safe cleaning and extraction reveal the physical defects covered in Section 2 — etching, lippage, heavy coatings, or cavities needing structural bonding — since no stronger product or extra sealer coat will correct them.
The homeowner workflow ends with assessment, product testing, dry-soil removal, stone-safe cleaning, agitation, slurry extraction, limited grout filling, complete drying and sealing. Broader guidance sits in the travertine flooring care and restoration hub, which helps distinguish a mainly contaminated floor from one where the stone has physically deteriorated.
Once dry, photograph recurring dark patches and cracks under the same low-angle light, and note whether they return after cleaning. That evidence helps a specialist recommend the right next step.

David Allen — Abbey Floor Care
David Allen has more than 30 years of experience with Abbey Floor Care, assessing and restoring travertine floors throughout the UK. His work includes the controlled process covered here: stone-safe cleaning, slurry extraction, limited cosmetic filling, complete drying and sealer application, with clear boundaries for defects requiring professional intervention.
Recent Posts:
We work throughout the country, just some of our work counties:
Copyright © 2026 Abbey Floor Care. Tile And Natural Stone Cleaning Consultants FAQ - Privacy Policy - Terms And Conditions
Abbey Floor Care is a participant in the Amazon Services LLC Associates Programme, an affiliate advertising programme designed to provide a means for websites to earn advertising fees by linking to Amazon.co.uk. As an Amazon Associate, we earn from qualifying purchases.