A Heavy Build-Up Of Old Sealer Made Terracotta Cleaning In Sevenoaks Kent A Long Job
Last Updated on January 19, 2026 by David
A customer from Sevenoaks contacted me to see if I could help with the restoration of their terracotta floor.
The owners of the property were keen to restore the terracotta and asked for my advice on the best way to renovate it without causing damage.
After discussing the options for this particular floor, we agreed the most suitable approach and set a start date.
They’re so lovely I don’t want to walk on them. Our painter used to do floors and commented on the good job you’ve done!!
Thank you again for your hours of hard work. It was a pleasure having you here.
Confirm The Existing Terracotta Sealer
Older terracotta floors can have all sorts of coatings on them from past owners, including different types of surface sealers, waxes, and even paint. Before you can do anything safely, you need to work out what you are dealing with and how many layers are on the floor.
From the look and feel of the coating, it appeared to be a water-based surface sealer rather than a wax. My client also showed me a container of the original sealer, which confirmed what it was.
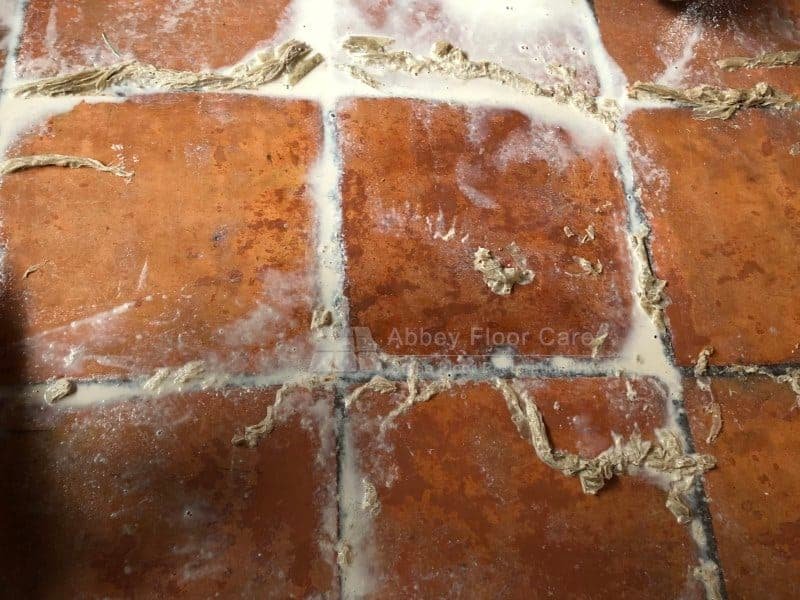
It was also clear there was a heavy build-up of old sealer across the floor.
When I asked how it had happened, my client explained that over the years they had applied new layers to bring back the shine, without stripping back the older layers first. In places, especially in the grout, the build-up was very thick.
I carried out small test areas to confirm the safest and most effective way to break down the coating on this floor. The tests also made one thing clear: because the build-up was so heavy, it would take multiple rounds to remove it fully.
I had originally estimated two to three days for the stripping stage, but once the tests were done it was obvious the job would take longer. Thankfully, my client understood why.
Terracotta Cleaning – Remove The Existing Sealer
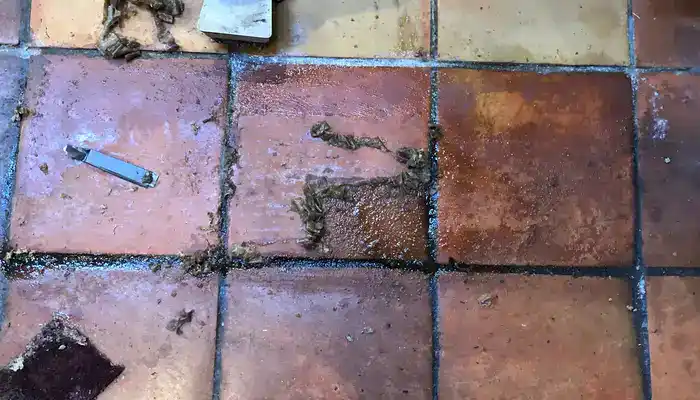
I worked in manageable sections, applying the sealer removal treatment, keeping it active, and then scrubbing with equipment suited to a textured surface and deep grout lines. After each pass, the residue was rinsed and extracted so it was not reabsorbed back into the tile and joints.

In the worst areas, the residue was still very heavy, so careful hand work was needed as well to lift the softened coating without damaging the surface.
It took four to five applications of the removal process to reach clean tile again.
Removing Terracotta Sealer from Corners And Edges
Corners, edges and areas around fixed furniture were detailed by hand using brushes and pads.
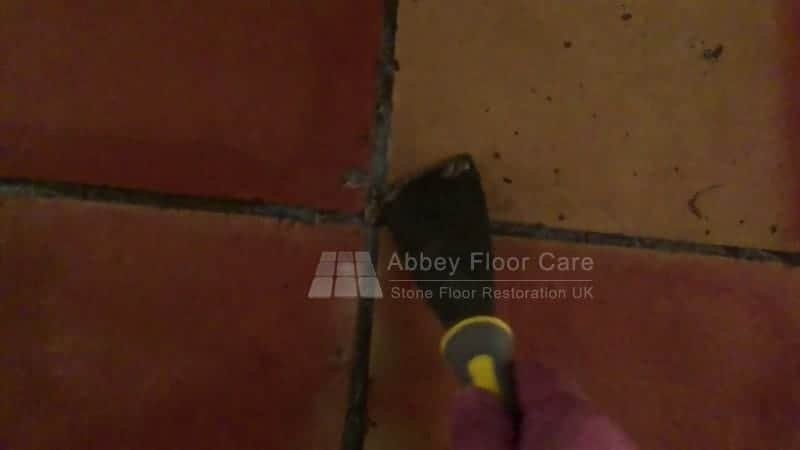
Removing Terracotta Sealer From Deep Grout
Some of the deepest grout lines held onto old sealer more stubbornly than the tile faces. Where needed, I used a combination of hand brushing and careful scraping to reduce the remaining build-up in the joints.
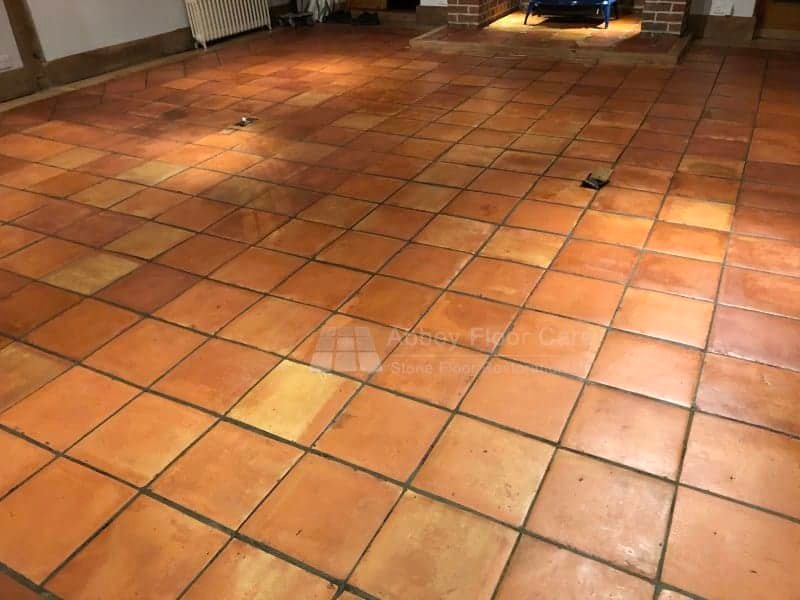
By the end of the available time, the vast majority of the old coating had been removed, with only small traces left in a few of the deepest sections of grout.
Allow The Terracotta To Dry
Because terracotta is so porous, drying is not a “nice to have”. It is essential. A damp terracotta floor can take in sealer unevenly and leave patchy results.
During the work, I used air movers to support drying. Once the stripping and rinsing stages were complete, the floor was left to dry for a further two days with airflow maintained.
Terracotta Sealing
At first, the plan was to reseal with a water-based surface sealer, but looking at how the home was used (including regular foot traffic and pets coming in from outside), it was clear the client needed a lower-maintenance, more durable solution.
So we moved to a breathable impregnating sealer system that would soak into the terracotta rather than sit as a thick film on top. This type of approach helps reduce rapid absorption and makes routine cleaning simpler, without relying on heavy surface build-up.
Applying The Sealer To The Terracotta
After the first coat, the sealer absorbed deeply into the terracotta. A simple water check showed the protection level we were aiming for: the water stayed on the surface long enough to be wiped away without leaving obvious darkening.
The initial finish was matt, and my client preferred a gentle mid-sheen, so additional coats were applied to achieve the look they wanted.
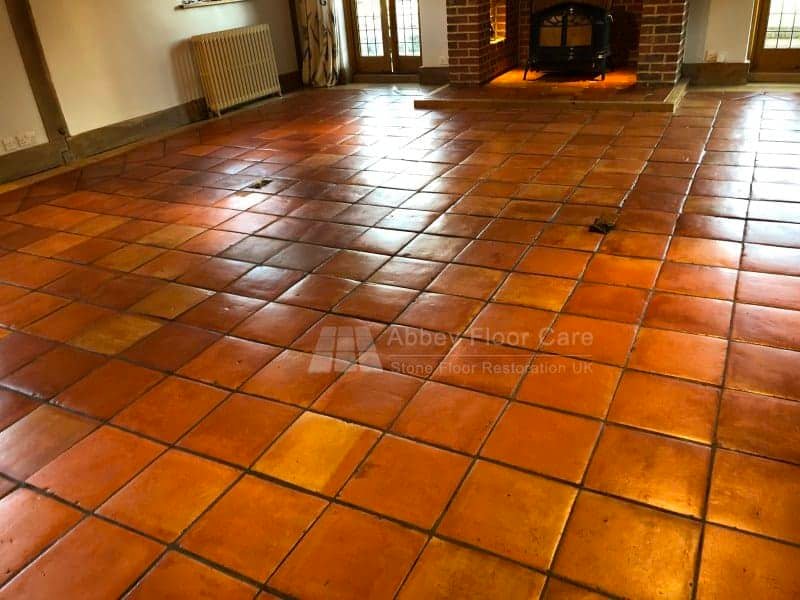
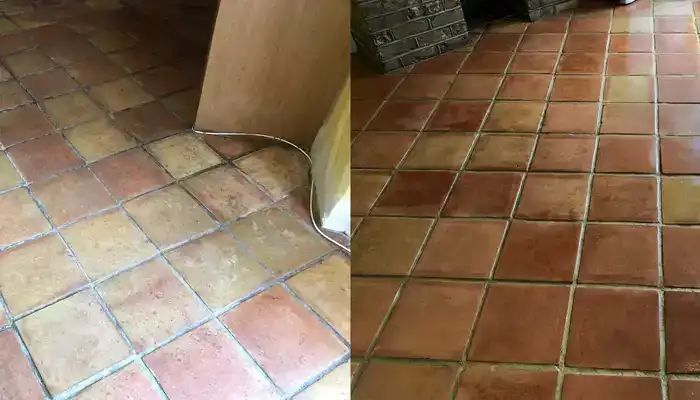
As you can see, the difference was dramatic once the old build-up was removed and the floor was properly dried and resealed.
If you would like wider context on terracotta floors (cleaning, sealing, maintenance and common problems), the main reference page is here: Terracotta floor care, cleaning, repair and restoration explained.
If you have a terracotta floor with heavy sealer or wax build-up and want it assessed properly, you can contact us here.
We’ll look at the condition of your floor, explain what’s going on, and let you know whether it can be safely stripped, dried, and resealed.
Case study documented by David Allen, terracotta floor restoration specialist.
Optional: Maintenance products (for readers who want them)
This case study is about removing heavy sealer build-up. If you simply want a few maintenance product options for routine cleaning, here are some commonly used items.
Disclosure: These are affiliate links. If you buy through them, we may earn a small commission at no extra cost to you.

Fila Pro Floor Cleaner
|

LTP Floorshine
|

Vileda H2PrO Spin Mop System
|
Recent Posts:
We work throughout the country, just some of our work counties:
Copyright © 2025 Abbey Floor Care. Tile And Natural Stone Cleaning Consultants FAQ - Privacy Policy - Terms And Conditions
Abbey Floor Care is a participant in the Amazon Services LLC Associates Programme, an affiliate advertising programme designed to provide a means for websites to earn advertising fees by linking to Amazon.co.uk. As an Amazon Associate, we earn from qualifying purchases.