A Worn Travertine Floor In Chippenham Restored To A Great Finish.
Last Updated on February 27, 2026 by David
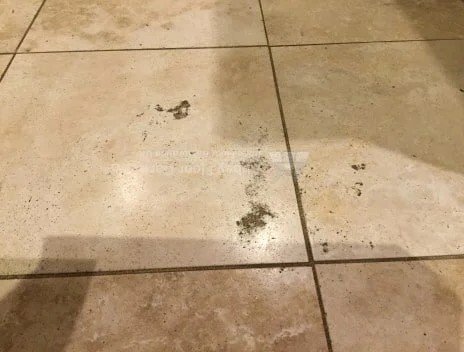
A worn travertine floor can be unsettling when it never quite looks clean, even after years of regular care. Dark patches collect in small holes, grout lines stay stubbornly grey, and the surface begins to look uneven compared with the rest of the home. This Chippenham floor showed all of those signs, not because it had been neglected, but because its original surface protection had gradually worn away.
This honed travertine floor was around fourteen years old when I was asked to take a closer look. In several areas, the thin surface layer had started to break down, exposing the natural voids beneath. Once that happens, soil settles into the pits and grout far more easily, making the floor appear permanently dirty.

Why is this floor difficult to keep clean
The main issues were typical of a well-used travertine floor with a worn sealer:
- Ingrained soil lodged in exposed pits and surface voids
- Grout lines that had darkened as they absorbed dirty mop water
- Larger holes where original fillers had collapsed over time
- Smaller pinholes were created as the surface layer thinned under foot traffic
Visually, the floor no longer matched the other cleaned floors in the house. Although it had been maintained, the stone itself was now absorbing soil faster than it could be removed.
Cleaning ingrained soil from travertine and grout
The first stage was a controlled deep clean of both the tiles and grout using a rotary machine and travertine-safe cleaning solutions. This removes surface contamination without damaging the already fragile surface layer. Even after this stage, some soil remained trapped in deeper voids, so the floor was pressure-rinsed to flush residue from the pits.
Stabilising larger holes and surface damage
Several larger cavities were no longer structurally stable, so these were repaired using a two-part, colour-matched hard filler. Masking was used to keep the repair precise and avoid unnecessary abrasion to the surrounding stone once the filler cured.

After curing, the repairs were gently refined with diamond pads to level them with the surrounding floor without creating additional voids.
Refining smaller pits and preparing for sealing
The remaining pinholes were filled with a colour-matched grout that integrates visually with the floor and helps prevent future soil accumulation. Once the grout residue was removed and the surface fully dry, the floor was ready for sealing.
Sealing to restore consistency and protect the surface
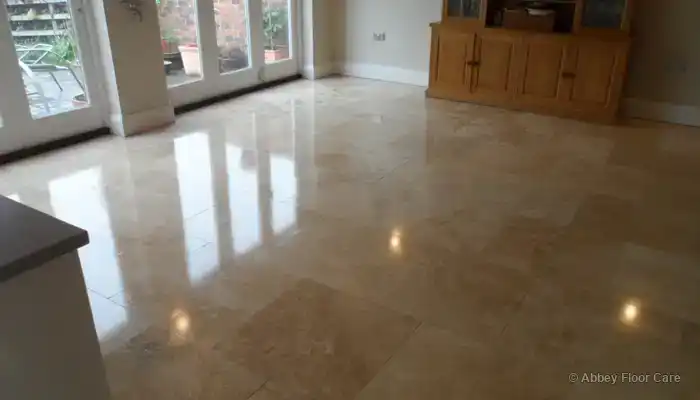
A mid-sheen, film-forming sealer was applied to provide a uniform appearance and create a sacrificial wear layer. Unfortunately, the final photographs of this floor were lost due to a camera fault, so an image from a similar travertine floor restored in New Malden has been included below to show the type of finish achieved after sealing.
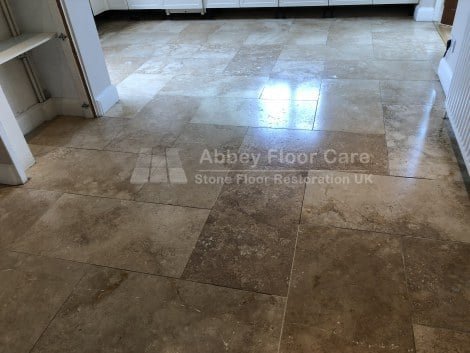
After completion, the floor looked cleaner, more even, and far easier to maintain, which was immediately noticeable to the homeowner.
I did not expect the floor to look this good. The floor looks much cleaner and nicer – thank you very much for your expertise.
This project is one of many examples referenced in our Travertine flooring guide, which explains how travertine behaves in real homes and why such issues develop over time.

Article by: David Allen – Abbey Floor Care – Natural stone and tile restoration specialist with over 30 years of hands-on experience in UK homes.
Documenting a completed travertine floor restoration project in Chippenham. It reflects observations made on this specific floor and the controlled restoration steps used,
and is presented as real-world evidence rather than general advice.
Recent Posts:
We work throughout the country, just some of our work counties:
Copyright © 2025 Abbey Floor Care. Tile And Natural Stone Cleaning Consultants FAQ - Privacy Policy - Terms And Conditions
Abbey Floor Care is a participant in the Amazon Services LLC Associates Programme, an affiliate advertising programme designed to provide a means for websites to earn advertising fees by linking to Amazon.co.uk. As an Amazon Associate, we earn from qualifying purchases.