How To Clean & Seal Terracotta Tiles (7-Step Guide)
Last Updated on February 21, 2026 by David
Seven Steps To Cleaning And Sealing Terracotta Tiles

This guide explains how to clean and seal terracotta floor tiles properly, from removing old coatings right through to keeping the floor looking good long-term. Terracotta is a beautiful but demanding material. It is far more absorbent than most people realise, which means success depends on doing things in the right order and allowing enough drying time.
The steps below focus on the process itself rather than individual products. Understanding what needs to happen, and why, will help you avoid patchy results, sticky finishes, or a floor that looks dirty again within weeks.
Step One: Turn Off Underfloor Heating
If your floor has underfloor heating, turn it off at least 48 hours before you start. Warm tiles cause cleaning solutions to evaporate too quickly and can make results uneven, especially on older terracotta.
Step Two: Protect Surrounding Areas
Before cleaning begins, protect skirting boards, cabinets, and nearby painted surfaces. The solutions used to remove old sealers can soften or mark finishes if they are splashed or left in contact.
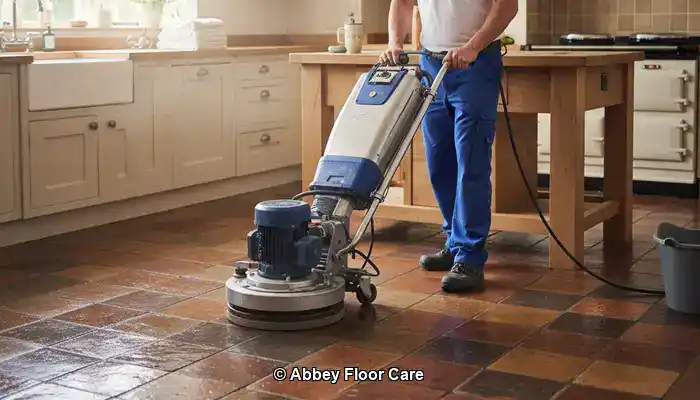
Step Three: Remove Old Sealers, Waxes, and Built-In Dirt
This is often called “the purge”, and it is the most important part of the whole job. Terracotta holds on to dirt and old coatings deep within the tile. If these are not fully removed, the floor will never seal evenly.
- Vacuum the floor thoroughly to remove loose grit.
- Apply a suitable stripping solution to soften old waxes or sealers and allow it time to work.
- Gently scrub to lift dirt from the surface and pores.
- Remove the dirty liquid completely so it is not drawn back into the tiles.
- Rinse and repeat where needed until the surface looks clean and consistent.
Rushing this stage is the most common reason terracotta floors end up patchy or disappointing after sealing.
Step Four: Allow the Floor to Dry Fully
Once cleaned, terracotta needs time to dry properly. Because the tiles absorb water like a sponge, this usually takes days rather than hours.
Allow at least 24 hours, and longer for older floors or thicker tiles. Keep the room ventilated but avoid direct heat. Dark patches are a sign that moisture is still present and sealing should wait.
Step Five: Sealing the Terracotta
Sealing reduces absorption, helps prevent staining, and brings the colour back to life. It is normal for terracotta to look pale or washed out after cleaning.
There are two main approaches:
- Traditional wax finishes, which give a warm, period look but need regular upkeep.
- Modern sealing systems, which offer more durable protection with less ongoing maintenance.
Which option suits you best depends on how the room is used, the look you want, and how much maintenance you are happy to take on. This is explained in more detail in our guide to choosing the most suitable sealing system for terracotta tiles.
Whichever system is used, the tiles must be completely dry and the sealer applied evenly. Any excess should be wiped away to avoid dark patches or sticky areas.
Can Terracotta Be Polished Like Terrazzo?
It is important to clear up a common misunderstanding. Terracotta cannot be mechanically polished in the same way as terrazzo. Terrazzo is a dense composite surface that can be ground and honed progressively to create a natural shine. Terracotta is different. It is a softer, more porous clay material and does not respond safely to diamond grinding in the same way.
Attempting to grind terracotta to achieve a terrazzo-style finish will remove the natural fired surface, alter the colour, and permanently change the character of the tile. Tt will leave the floor patchy or weakened.
What can be done is enhancement through sealing systems. Certain finishes deepen colour and create a soft sheen or higher gloss appearance, but this comes from the protective layer applied to the surface, not from polishing the clay itself.
If you are aiming for more shine, the answer is choosing the correct sealing and surface protection system — not mechanical polishing.
If your terracotta floor has heavy build-up, uneven colour, or years of old wax, professional restoration may be the safer option. You can read more about our terracotta cleaning and sealing service here.
Step Six: Surface Protection
Some sealing systems include an additional protective layer on the surface. This acts as a sacrificial barrier, taking everyday wear so the tiles themselves do not.
Thin, even coats are essential. Applying too much too quickly is a common cause of cloudiness and floors that attract dirt.
Step Seven: Ongoing Maintenance
Good maintenance makes all the difference to how long your floor looks its best.
- Dry sweep or vacuum regularly to remove grit.
- Damp mop with a gentle, neutral cleaner.
- Avoid harsh or abrasive cleaning products.
If a terracotta floor becomes dirty again very quickly after cleaning, this usually points to a sealing or maintenance issue rather than a problem with the tiles themselves. This is covered in more detail in our article on why terracotta floors keep getting dirty.
If, after cleaning, the tiles still look uneven, fragile, or powdery, it may indicate wear rather than surface dirt. In that situation, it helps to understand how to tell if terracotta tiles are worn out before deciding what to do next.
When the process is done correctly, cleaning and sealing terracotta restores its character, makes it far easier to live with, and protects your investment for years to come.
Recent Posts:
We work throughout the country, just some of our work counties:
Copyright © 2025 Abbey Floor Care. Tile And Natural Stone Cleaning Consultants FAQ - Privacy Policy - Terms And Conditions
Abbey Floor Care is a participant in the Amazon Services LLC Associates Programme, an affiliate advertising programme designed to provide a means for websites to earn advertising fees by linking to Amazon.co.uk. As an Amazon Associate, we earn from qualifying purchases.