
The Master Guide to Victorian & Minton Tile Restoration
Last Updated on February 28, 2026 by David
Victorian Tile Floors – Cleaning, Restoration and Repair
Victorian Tiles are not decorative surfaces in the modern sense. They are solid clay floors that were typically installed before damp-proof membranes were widely used.
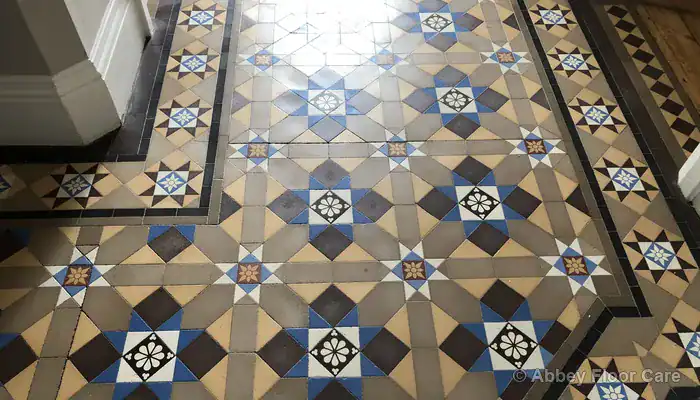
They’re an integral part of the building. In Victorian and Edwardian homes, these tiles were built into the floor itself, rather than being added as a surface layer. They move with the building. They respond to moisture. They sit within the natural rhythm of an entrance hall.
If you have one, you’re caring for a type of flooring that works very differently from modern ceramic or porcelain tiles.
Why Victorian Tiles “Breathe” (and Why It Matters)
What Are These Floors Made Of?
These floors are made from unglazed, porous clay tiles that allow moisture to pass through them naturally, which helps keep the floor stable over time.
Here’s what makes them different:
- They have tiny holes that let moisture pass through.
- The colour is baked into the tile, not just painted on.
- The edges of the tiles are square, helping them fit tightly together.
- They vary in hardness, depending on the colour and material used.
- They allow moisture to pass through, keeping the floor stable.
- They are more sensitive to wear and movement than modern tiles.
Encaustic tiles are often compared to painted tiles, but their patterns are created by inlaying different coloured clays into the surface of the tile before it’s fired. The colour layer is thin and can wear through in areas with heavy foot traffic or severe abrasion. Unlike surface coatings, the colour is embedded within the tile, but it can still erode over time.
Geometric floors follow a specific mathematical layout, starting with a six-inch square tile. Patterns like triangles, hexagons, and diamonds are designed from this base. These floors are often densely packed with hundreds of tiles in a single square metre.
These tiles are part of the original design of the building, not just a layer added on top.
Hidden Layers: What’s Under Your Hallway Floor?
In Victorian and Edwardian homes, the tiles were built directly into the structure of the house using a layered system:
- Compacted earth or rubble base.
- A lime-based slab for stability.
- A thin, brittle screed (the bedding layer).
- Half-inch solid clay tiles.
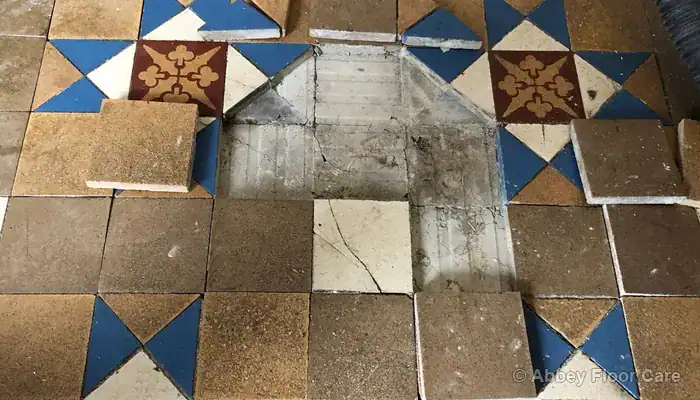
These tiles depend on compression and pressure to stay in place. If the brittle screed visible in the photo cracks, or if modern sealers or overcoatings like lino or carpet block the moisture from evaporating, the tiles will eventually work themselves loose.
This is why we treat these floors as an “active” part of the building, not just a surface covering.
These floors didn’t have a damp-proof membrane, so moisture could naturally move through them. This moisture movement is key to how the floor works.
In some cases, the tiles were laid over brick vaults or wooden joists, which means they could shift or move slightly over time.
Soft vs. Hard Clay: Identifying Your Tile’s Wear Pattern
Unlike modern tiles, these clay tiles don’t all wear at the same rate.
- Soft colours like reds and buffs wear down more quickly.
- Darker colours, like deep brown or black, are harder and last longer.
- In encaustic tiles, the colourful inlay can be softer than the base clay.
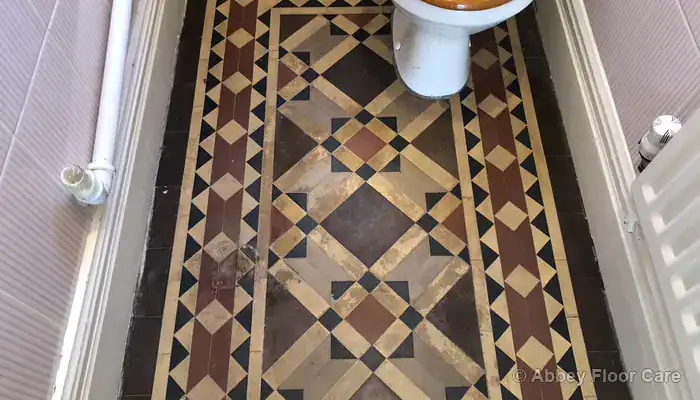
Natural “dishing” occurs over 150 years as foot traffic wears the softer clay tiles.
Over time, the areas where people walk most often start to show wear. The surface of the tiles can become slightly concave, which is called “dishing.” This is a natural result of wear and tear, but it can’t be reversed.
The Danger of Trapped Moisture: Preventing Salt Damage
The main thing to understand about these historic floors is that they were built to let moisture move through them.
Because there was no damp-proof membrane, moisture from the ground would naturally pass through the tiles and evaporate. This helps keep the floor from being damaged by trapped moisture.
However, problems can happen when something blocks that natural movement. If a coating is applied that doesn’t allow moisture to evaporate properly, it can cause damage like discolouration, cracking, or loosening tiles.
The Restoration Roadmap: Defining Your Project Scope
Before starting, it is vital to understand the difference between a surface clean and a structural restoration. Most Victorian floors require a combination of the following:
🧼 Cleaning: The removal of 100+ years of dirt and non-breathable waxes. This returns the clay to a “neutral” state but does not repair physical damage.
🛠️ Repair: Re-setting loose tiles and replacing shattered units. This restores the compression needed to keep the floor stable.
🛡️ Sealing: Applying a microporous (breathable) impregnator. This protects against spillages without trapping moisture in the sub-floor.
✨ Restoration: A full-service approach that combines cleaning, structural repair, and sympathetic finishing.
📅 Maintenance: The long-term plan to prevent grit abrasion and salt buildup using specialist, pH-neutral products.
The Heritage Restoration Protocol: 7 Steps to Reviving Victorian Tiles
Can old tiles be cleaned? Is a question we often get asked about Victorian encaustic tile floors. Yes you can, if you have the right materials, time and patience. Read on to see our 7 step guide to victorian tiles cleaning.
Cleaning Victorian Tiles – Learn how to restore and clean Victorian and Edwardian encaustic tiles with this helpful guide.
Victorian tiles were first introduced in the 1800s and come in many different shapes, sizes and colours.
While there were a lot of manufacturers, The Minton, Hollins, & Co were one of the first and more influential companies in the development of encaustic tiles.
And to this day, these tiles are often referred to as Minton tiles.
From the 1880s onwards geometric and encaustic tile floors became popular features in the homes of the middle classes.
Minton floors contain plain tiles and encaustic tiles.
You often find more wear from heavy footfall in the earth colour plain and encaustic tiles compared to the highly pigmented tiles; back, blue, white and green tiles.

Glazed ceramic tiles are rare in ordinary house floors, as most floors used unglazed tile.
These types of tiles fell out of style during the 1960s and 1970s.
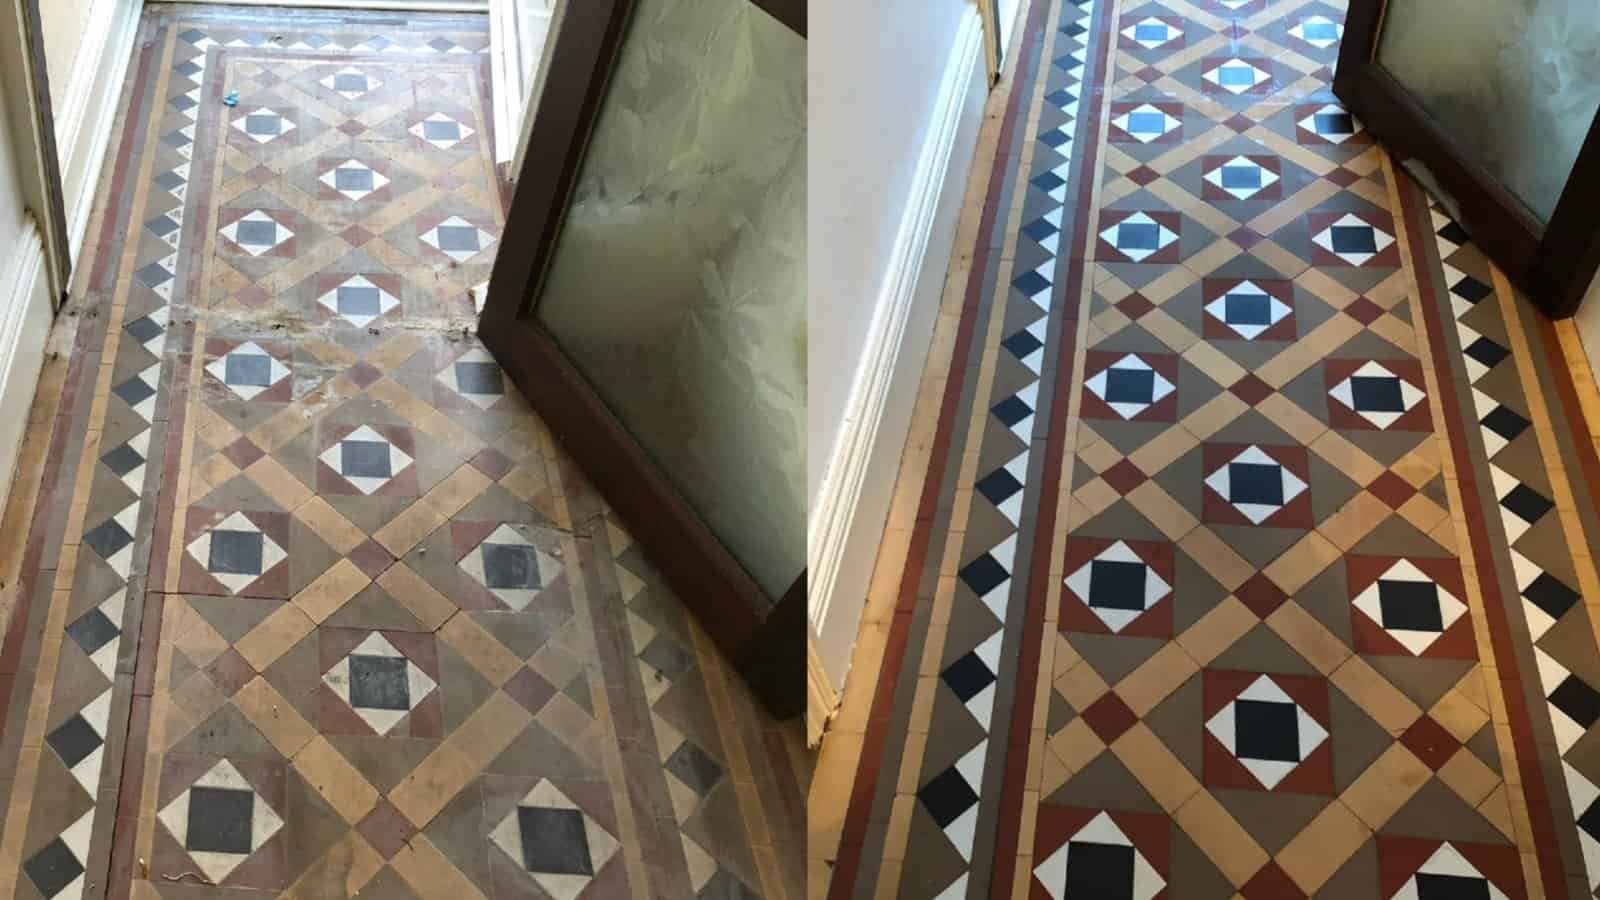
Lots of the floors were covered with carpet and suffered substantial damage from the dreaded carpet gripper nails, or service engineers installing new pipework under the flooring!
Now, however, they are being rediscovered by their current owners.
If you have a Victorian or Edwardian hallway floor, after 150 years, it is unlikely that your tiles are in perfect condition.
Steps To Cleaning Victorian Tiles
A big part of maintaining vintage floor tiles is understanding how to clean a worn tile floor.
Believe it or not, poor cleaning can damage your floor.
Understanding how to clean Victorian floor tiles will help you keep your floor looking beautiful for years to come.
1. Prepare The Area For Cleaning
Remove all free-standing furniture. Dry sweep the tiles or use a vacuum cleaner to remove dry soil and grit from the tiling.
2. Remove Old Waxes And Coatings
The key to successful tile cleaning is patience.
To strip off waxes and water based acrylic sealers use a sealer remover, LTP Solvex, to remove most types of sealer and wax coatings.
It also remove paint, which is great as floors often have paint spots, but not so good as it will remove paint from skirtings.
So, protect your skirting with 2 inch low-tack masking tape.
I suggest spreading the sealer remover with a natural hair paint brush, not a synthetic brush.
If you can’t get a natural hair paint brush, a cheap natural hair dust brush will work fine.
Before you start, test your cleaning method on a small area to ensure it works and that you are comfortable with the process.
Apply the product to the floor and leave it for 10 to 20 minutes so it can soften the sealer.
Work in manageable sections because the chemical may soak into the tile and you need to keep the surface wet.
Scrub the area with a black cleaning pad.
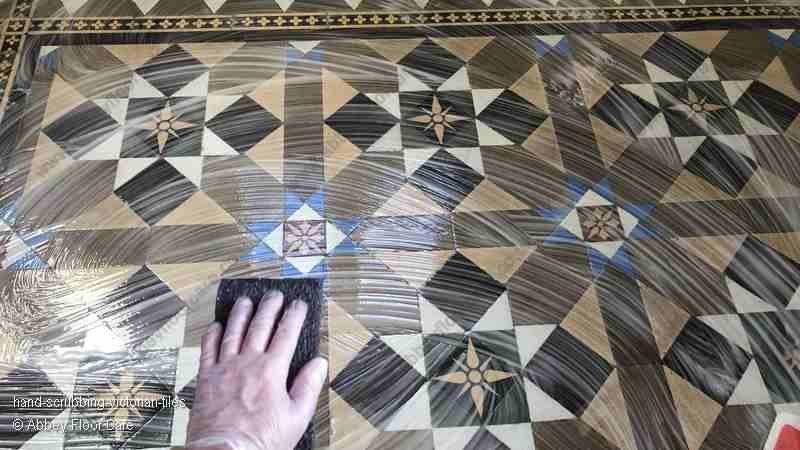
If you are hand scrubbing, wear protective gloves.
If the sealer is coming away, continue until all of the old sealer residues are removed.
If you have worn tiles with a dished surface, or old coatings stuck in grout lines or chips, you may need to repeat the process a number of times.
As I said above, these products are potent chemicals, they will act as a paint remover, so be careful near skirting boards and any standing furniture edges.
Scrape off thick residues with a plastic blade into a black rubble sack.
Remove the remaining residue using clean warm water, a sponge and then dry with a cloth or towel.
Then rinse a couple of times with an alkaline cleaner like LTP Grimex, diluted 1 to 10 with clean water.
A wet-dry vacuum machine will prove helpful and save in cloths.

Finally, rinse thoroughly with clean hot water and dry cloth or a wet vacuum cleaner. Allow the floor to dry completely before applying further treatments.
Our Victorian tile flooring guide explains how encaustic tiles behave in real homes, what typically causes dulling and patchiness, and what to avoid to keep the surface intact.
If you have glue from carpet grippers or paint residues, LTP Solvex will help to remove them.
If you have cement or grout haze (grout smears) is present use LTP Cement, Grout & Salt Residue Remover.
Extract the solution with a wet-dry vacuum cleaner and then rinse thoroughly with clean water and vacuum again.
In most cases, removing the surface coatings will also clean the tiles.
However, if you don’t have surface residues, then you can use less aggressive cleaners.
Some sealers are very difficult to remove, especially solvent-based acrylic sealers.
If the sealer removers will not remove it, you may have a solvent-based acrylic sealer on your tiles.
If you have one of these sealers, you will need to call on professional help.
I carry a range of specialist sealer removers, yet sometimes it can take me a long time to remove these sealers from a small floor.
3. Cleaning Dirty Victorian Tiles
Clean soiled tiles and stubborn stains with an alkaline cleaning solution tile cleaner like LTP Grimex and dilute according to the the manufacturer’s instructions.
Apply the detergent to the tile surface and leave for 10 minutes, this is called the dwell time.
Work in manageable sections, because you need to keep the area wet with cleaner, so keep re-applying the cleaner if it soaks into the tiles.
Then agitate using:
- a natural bristle hand scrubbing brush, a natural bristle is more resistant to solvents
- or a natural bristle a deck brush
- or a black scrubbing pad to remove the dirt.
If you have a slow-speed buffing machine, cleaning Victorian tiles will be quicker to remove dirt from tiles.
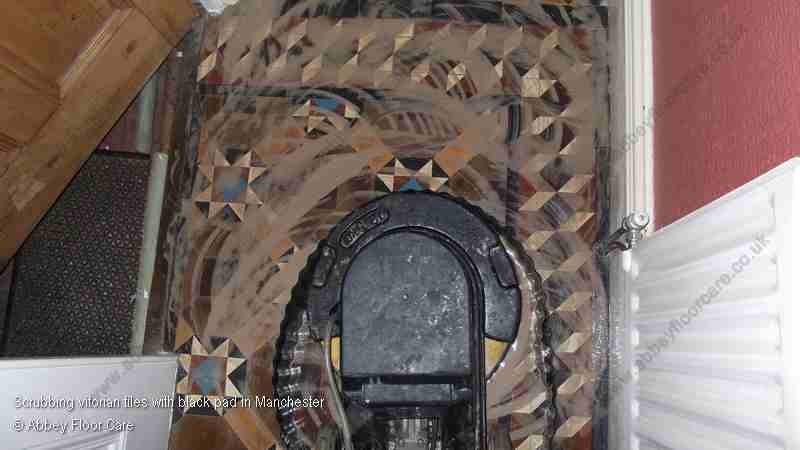
When you use a black scrubbing pad, don’t be too aggressive as earth colour tiles are soft and you don’t want to wear away the surface of the tile.
Remove the soiled solution with a dry cloth, or preferably, a wet vacuum cleaner and then rinse thoroughly with clean water and wipe with new towels or vacuum again.
After cleaning, the earth-coloured clay tiles will probably look faded. This happens on this type of tile as the original tiles wear and the colours can be brightened with a sealer.
For the bigger picture, our Victorian tile flooring guide explains how encaustic tiles behave in real homes, what usually causes dulling and patchiness, and what to avoid to keep the surface intact.
4 Treating Efflorescence On Victorian and Edwardian Tiles
Victorian hallway tiles were usually laid on a wet lime cement, without a damp membrane.
However, I have come across tiles laid on bricks and mud! Damp and salts (efflorescence) issues are quite common with these floors.
This is exacerbated where a floor has been covered for years, preventing the floor from breathing.

The cleaning process can activate dry salts in these antique tiles, which become apparent as the floor dries, leaving white marks.
If you come across this issue, apply an acid salts residue treatment, to treat the surface salts. Take care using chemicals, use appropriate ppe.
Apply the treatment as per the instructions, allowing the recommended dwell time and then rinse with clean water and remove with a dry cloth or wet vacuum.
You may need to re-treat the floor in two to three days time should the salts re-appear.
If the salts do not go away, then there is still residual moisture in or below the tiles and this may be the natural state of the floor.
N.B. Always rinse surfaces thoroughly with cool clean water.
As I discussed earlier, original Victorian hallway tiled floors were fitted without a DPM (damp proof membrane).
So after deep cleaning the floor should be allowed to dry for several days, (especially during winter time and following periods of high rainfall).
You can use a damp meter to test your floor for dryness.
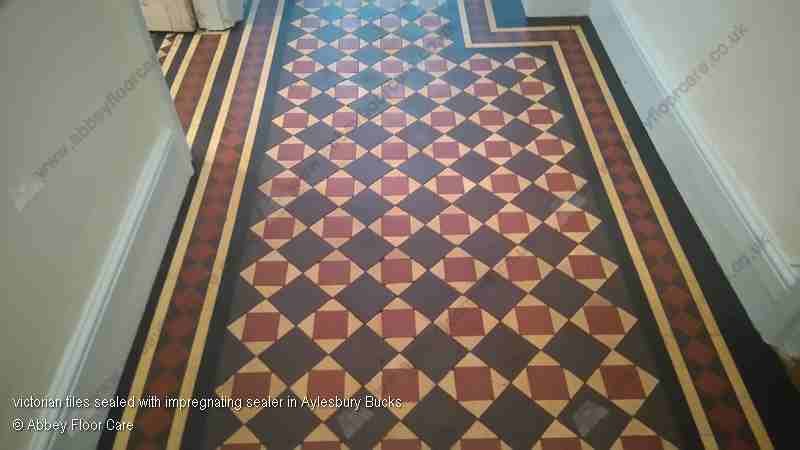
5. Sealing Victorian Tiles
We recommend first applying a coat of colour-enhancing impregnating sealer.
These sealers have colour-enhancing polymers that will improve the look of faded tiles, often restoring the original colours.
The sealer is absorbed into the tile just below the surface, sealing the microscopic pinholes and open fissures.
These sealers are microporous, which means they repel surface moisture and help prevent stains, but allow water vapour to pass through, allowing the floor to breathe.
Apply the seal generously according to the manufacturer’s instructions and work it well into the surface.
Remove any excess sealer that has not been fully absorbed within 20 minutes using a lint-free cloth.
Leave the sealer to cure sufficiently before applying a second coat.
An impregnating sealer can be walked over within a few hours, however, they need up to 3 days to fully cure.
If you prefer a natural, matt finish, your job is done.
Old Victorian tile floors should not be sealed with an impermeable surface sealer, as they will stop the floor from breathing. Nevertheless, I have come across many floors sealed with a satin or gloss finish liquid polymer Acrylic like LTP Ironwax Satin Sealer or a wax like LTP Clearwax over the impregnating sealer.
There must be been no moisture from damp or salts, as they will cause the sealer to bloom and lift and damage the tiles.
6. Look After Your Victorian Floor Tiles With Regular Maintenance Cleaning
Ongoing care is important to maintain the appearance of a Victorian tile floor.
Dry sweep or vacuum the floor to remove loose soil and grit.
Damp-mop the floor with the cleaner recommended by the sealer manufacturer.
If in doubt, use a ph Neutral friendly cleaning product like LTP Waxwash for floors sealed with an impregnating sealer or coated with wax.
If the tiles have been sealed with a water based topical sealer like LTP Ironwax satin, then clean with LTP Floorshine or just clean water until you have confirmed the right cleaner to use.
Do not use standard household cleaning products or washing up liquid.
Homes normally have a range of products that are not sealer friendly and will eventually weaken surface sealers and coatings.
Check the tile surfaces and if the coating or sealer is starting wear, clean the floor and top up the coating.
You can find a full range of products suitable for cleaning Victorian tiles, but always make sure they are compatible with your chosen sealing system.
7. Restoring Victorian Tile Floors
After 150 years, it is not uncommon to find tile floors with loose, cracked or missing tiles.
If the building moves, the floor can shift. This is especially true for floors installed over wooden beams or brick vaults. Before making repairs, it’s important to ensure the structure is stable. The tiles rely on compression; if the base layer loses stability, it causes breakage that cleaning alone cannot fix.
If there has been movement in the floor, you can have wide grout lines.
If you are handy, you can undertake repairs on original tile floors.
However, if your floor is in poor condition, possibly with substantial movement or a large number of missing tiles, we advise contacting a specialist.
I hope you have found this guide helpful, and I wish you well with your project.
A Victorian hallway floor is a 150-year-old piece of history—if your tiles are hidden under glue, paint, or decades of wax, [Contact Abbey Now] for a professional restoration quote and let us reveal the stunning heritage patterns hiding beneath.
A Victorian hallway floor is a 150-year-old piece of history—if your tiles are hidden under glue, paint, or decades of wax, Contact Abbey Now for a professional restoration quote and let us reveal the stunning heritage patterns hiding beneath.
Professional Heritage Case Studies
Explore real-world examples of the restoration techniques described in this hub:
🛡️ The Limits of Intervention
There are certain “restoration” practices that should never be performed on heritage clay floors. Doing so can cause irreversible damage to 150-year-old materials.
- 🚫 Grinding: This removes the original fired clay material, destroys the factory finish, and is rarely justified for Victorian tiles.
- 🚫 Impermeable Coatings: These block moisture movement, causing “blooming” (white clouds) or causing the tiles to lift and delaminate.
- 🚫 Flooding: Excessive water during cleaning can disturb the delicate salt balance in the sub-floor, leading to severe efflorescence.
- 🚫 Outdoor Sealing: Never seal outdoor clay tiles with film-forming coatings; it traps moisture that expands when frozen, shattering the tile surface.
Final Thought
A specialist working with your historic clay tiles will focus on understanding how the floor behaves, what risks it faces, and what limitations should be respected. They won’t promise a perfect, new-looking floor, but they will help ensure that the tiles continue to endure for many more years.
These floors endure because they were built with a deep understanding of materials. By respecting their original design, they’ll continue to serve their purpose, just as they have for over a century.
Recent Posts:
We work throughout the country, just some of our work counties:
Copyright © 2025 Abbey Floor Care. Tile And Natural Stone Cleaning Consultants FAQ - Privacy Policy - Terms And Conditions
Abbey Floor Care is a participant in the Amazon Services LLC Associates Programme, an affiliate advertising programme designed to provide a means for websites to earn advertising fees by linking to Amazon.co.uk. As an Amazon Associate, we earn from qualifying purchases.